
Running Windows Containers in Openshift 4.8
This article is based on the content located at https://docs.openshift.com/container-platform/4.8/windows_containers/understanding-windows-container-workloads.html
In order for Windows containers to run from Openshift, dedicated Windows nodes need to be provisioned. At the time of this writing only IPI installs (Installer-Provisioned-Infrastructure) for AWS, Azure, and Vsphere are supported.
I am going to demonstrate the steps needed using Vsphere IPI. When the cluster is first installed, a few changes need to be made to the install-config.yaml. The first change is to make the networking "Hybrid networking with OVN-Kubernetes with a custom VXLAN port".
Once the cluster is installed, the "Windows Machine Config Operator" will need to be installed. Next, A Windows MachineSet will need to be created (and a Windows Template VM). Lastly, a Windows container workload will be deployed to the cluster.
Deploying Vsphere IPI Cluster (with OVN Kubernetes and Custom VXLAN Port)
The steps I am following are based on https://docs.openshift.com/container-platform/4.8/networking/ovn_kubernetes_network_provider/configuring-hybrid-networking.html#configuring-hybrid-ovnkubernetes
I am installing version 4.8.13 of OCP. I already have the openshift-install binary and oc binary installed in /usr/local/bin.
- Make an empty directory to contain the artifacts for this install. In this environment, the directory is called openshift-install.windowscontainer.
mkdir openshift-install.windowscontainer2. Create an install-config.yaml to specify OVNKubernetes networkType. Change values specified in "<>" with appropriate values for your environment. It is best to put any usernames or passwords in single quotes.
apiVersion: v1
baseDomain: <base DNS Name>
compute:
- hyperthreading: Enabled
  name: worker
  replicas: 3
  platform:
    vsphere:
      cpus: 2
      coresPerSocket: 2
      memoryMB: 8196
      osDisk:
        diskSizeGB: 120
controlPlane:
  hyperthreading: Enabled
  name: master
  replicas: 3
  platform:
    vsphere:
      cpus: 4
      coresPerSocket: 2
      memoryMB: 16384
      osDisk:
        diskSizeGB: 120
metadata:
  name: <cluster-name>
networking:
  clusterNetwork:
  - cidr: 10.128.0.0/14
    hostPrefix: 23
  networkType: OVNKubernetes
  serviceNetwork:
  - 172.30.0.0/16
platform:
  vsphere:
    vcenter: <your.vcenter.server>
    username: <vcenter username>
    password: <vcenter password>
    datacenter: <vcenter datacenter>
    defaultDatastore: <vcenter datastore>
    folder: <optional folder>
    network: <network to use>
    cluster: <vsphere_cluster_name>
    apiVIP: <api_vip IP>
    ingressVIP: <ingress_vip IP>
fips: false
pullSecret: '{"auths": ...}'
sshKey: 'ssh-ed25519 AAAA...'
Copy this file to your install directory (openshift-install.windowscontainer) in this example and name the file "install-config.yaml"
The manifest objects for networking need to be edited before the cluster is instantiated.
openshift-install create manifests \
--dir=openshift-install.windowscontainer
Answer any of the questions that are presented by the installer. IE: Access to SSH-key, Vcenter access, datastore, networking, pull-secret, etc.
3. Create a custom cluster-network-config to be injected into cluster at install-time.
cat <<EOF > openshift-install.windowscontainer/manifests/cluster-network-03-config.yml
apiVersion: operator.openshift.io/v1
kind: Network
metadata:
  name: cluster
spec:
  defaultNetwork:
    ovnKubernetesConfig:
      hybridOverlayConfig:
        hybridClusterNetwork:
        - cidr: 10.132.0.0/14
          hostPrefix: 23
        hybridOverlayVXLANPort: 9898
Note: Omit the last line of this file (hybridOverlayVXLANPort: 9898) if doing this using Windows Server 2019. For Windows Server 2004/20H2, leave in place.
4. Proceed with the rest of the steps to create the OCP cluster.
openshift-install create cluster \
--dir=openshift-install.windowscontainer
5. See the video below for these steps.
In the video, the install took a little longer than normal due to some hardware issues in my environment. I had to manually run the following commands to finish install. Usually all of these steps run automatically.
openshift-install wait-for bootstrap-complete --dir=openshift-install.windowscontainer

openshift-install wait-for install-complete --dir=openshift-install.windowscontainerYou will be provided with the following information after this step is completed. I omitted the console URL and username/password to login to cluster.

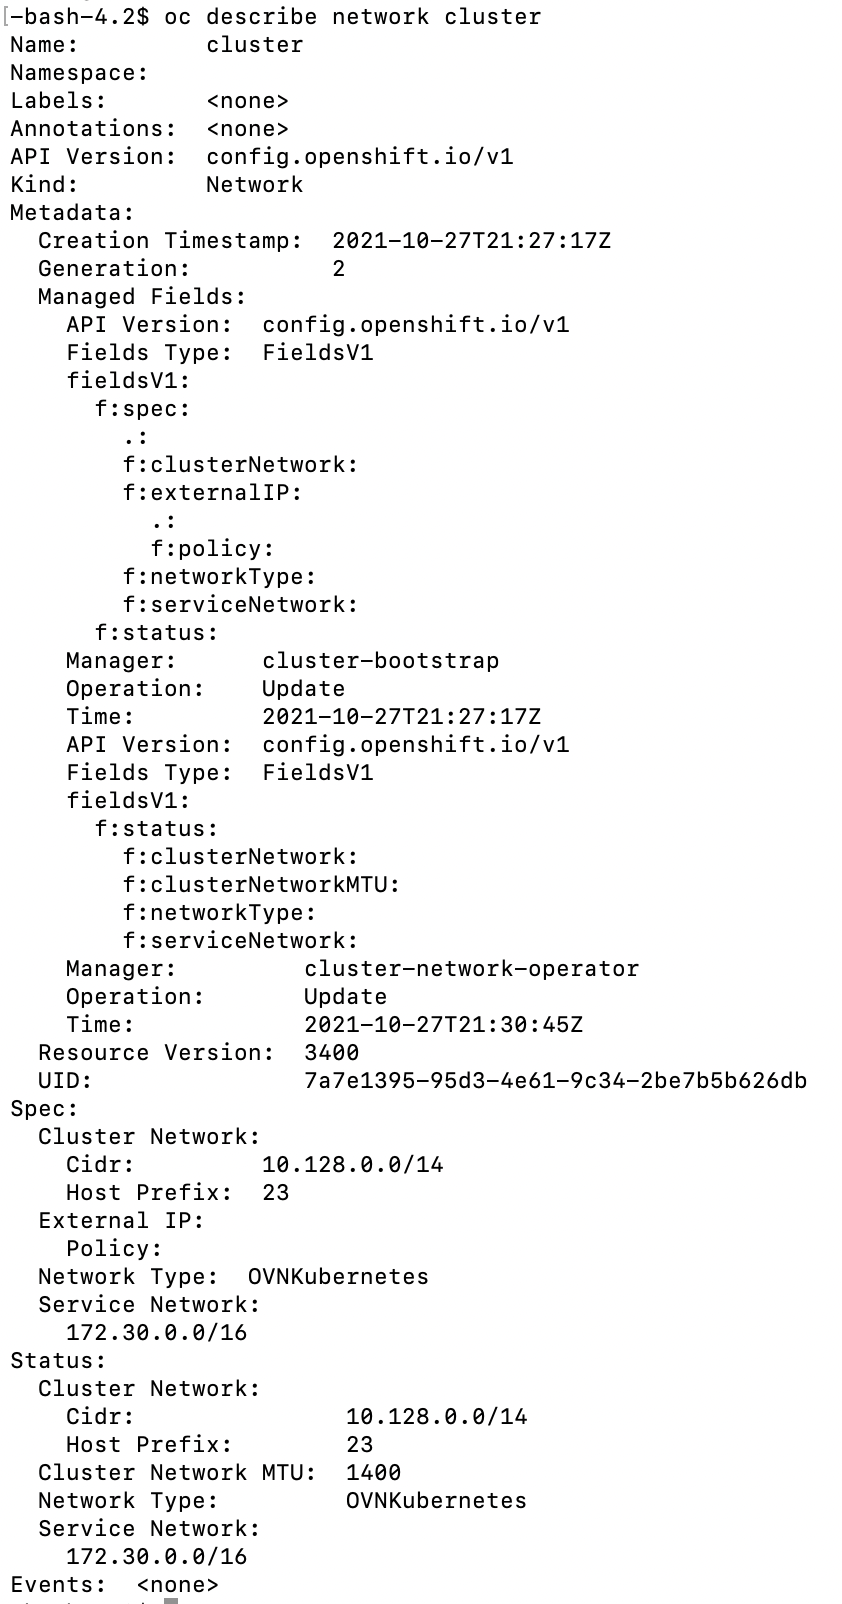
To confirm that OVNKubernetes is the CNI Network provider, run the following command:
oc describe network clusterYou should see OVNKubernetes listed in the output
Installing Windows Machine Config Operator
After the cluster is installed, the Windows Machine Config Operator will need to be installed. Version 3.1.0 is being installed (as of this writing)
- From the Openshift-console, go to Operators --> OperatorHub
- In the search-box, type "Windows Machine." Select the "Windows Machine Config Operator". Make sure you don't select the Community one.
- In the install wizard, the only change you will make is to check the box that says "Enable Operator Recommended Cluster Monitoring in this namespace"
4. Following the install, it is required to create a private key which will be used. This is required for Windows Machine Config Operator to communicate with the Windows VM we will create next.
On the command-line, run:
ssh-keygen -t rsaI saved the file with a different name than my regular SSH key.
5. Next, import this as a secret
oc create secret generic cloud-private-key --from-file=private-key.pem=${HOME}/.ssh/<key> -n openshift-windows-machine-config-operator Prepping Windows Image for OCP
A golden Windows image will need to be made for this. I downloaded Windows Server 2019 for demo purposes. This version of Windows is not supported for inter-pod connectivity between hosts (but will work with a single Windows node). The supported version of Windows Server (either 2004 or 20H2) requires an MSDN subscription which I don't have.
- Create a virtual machine inside of Vmware based off of Windows Server 2019 (accept the default hardware recommendations).
Memory: 4GB of RAM
CPU: 2 VCPU
Hard Drive: 40GB
CD/DVD: Boot of Windows 10 ISO (Connect CD ROM at Boot)
VM Options --> Boot Options --> Firmware --> BIOS
Network: Private (same as OCP nodes)
- Boot up the virtual machine and select Windows Server 2019 Standard (non-gui). Go through the setup wizard. Set the Administrator password.
- Ensure that the VM is on the network and has a connection to the Internet to perform Windows updates. Type the following at command prompt to update.
# To get PowerShell Prompt
PowerShell.exe
#Install Windows Update PowerShell Module
Install-Module PSWindowsUpdate
# Get List of Updates
Get-WindowsUpdate
# Install Updates and accept/reboot
Install-WindowsUpdate -AcceptAll -AutoReboot
4. Install VMWare Tools. Go to Guest OS menu --> Install VMWare Tools. You may need to unmount Windows install media before you do this. On the console of the VM, run:
D:\setup64.exe (or D:\setup.exe if 32 bit)
It may take a while to get output back from the installer but be patient.
5. On the VM, create the following file under C:\ProgramData\VMWare\VMWareTools\tools.conf and ensure the following line exists
Run the following command to create the file
notepad.exe "C:\ProgramData\VMWare\VMWareTools\tools.conf"and add the following content:
exclude-nics=Ensure the file exists.
6. Ensure that the VMWare Tools service is running. Using Windows Powershell, run:
Get-Service -Name VMTools | Select Status, StartType7. Follow these steps to configure OpenSSH service. https://docs.microsoft.com/en-us/windows-server/administration/openssh/openssh_install_firstuse
Run the following commands in Powershell:
This is to ensure that the OpenSSH package exists
Get-WindowsCapability -Online | Where-Object Name -like 'OpenSSH*'Install Client and Server
# Install the OpenSSH Client
Add-WindowsCapability -Online -Name OpenSSH.Client~~~~0.0.1.0

# Install the OpenSSH Server
Add-WindowsCapability -Online -Name OpenSSH.Server~~~~0.0.1.0
Ensure that the server is running, starts, automatically, and firewall rule allows connection.
# Start the sshd service
Start-Service sshd

# OPTIONAL but recommended:
Set-Service -Name sshd -StartupType 'Automatic'
Create the authorized_keys file with the public-key based on step 5 of the previous section. This lets the machine-config-operator manage this Windows VM. The username should be Administrator.
# Make sure that the .ssh directory exists in your server's user account home folder
ssh user1@domain1@contoso.com "mkdir C:\ProgramData\ssh\"

# Use scp to copy the public key file generated previously on your client to the authorized_keys file on your server
scp C:\Users\username\.ssh\id_ed25519.pub user1@domain1@contoso.com:"C:\ProgramData\ssh\administrators_authorized_keys"

# Appropriately ACL the authorized_keys file on your server
ssh user1@domain1@contoso.com icacls.exe "C:\ProgramData\ssh\administrators_authorized_keys" /inheritance:r /grant "Administrators:F" /grant "SYSTEM:F"
Load your private key and ensure that you can connect as your Administrator user (without password)
9. Follow this document to install Docker for Windows
At Powershell prompt, run:
# Answer "Y" to any prompts
Install-Module -Name DockerMsftProvider -Repository PSGallery -Force
# Answer "A" to any prompts
Install-Package -Name docker -ProviderName DockerMsftProvider
Restart-Computer -Force
10. Open up firewall rule on Windows VM to enable reading logs from OCP.
New-NetFirewallRule -DisplayName "ContainerLogsPort" -LocalPort 10250 -Enabled True -Direction Inbound -Protocol TCP -Action Allow -EdgeTraversalPolicy Allow
11. Clone the Windows VM following these steps
Wait for the operation to complete. You can now shutdown the original windows VM and power this one on.
12. Edit this template and copy to Root directory of VM (C:\)
It will be easier to create this on your Linux VM and SCP it over.
Be sure the change the following:
Computer Name (if you wish)
AdministratorPassword Value: Set this to the value you used in your VM
<?xml version="1.0" encoding="UTF-8"?>
<unattend xmlns="urn:schemas-microsoft-com:unattend">
   <settings pass="specialize">
      <component xmlns:wcm="http://schemas.microsoft.com/WMIConfig/2002/State" xmlns:xsi="http://www.w3.org/2001/XMLSchema-instance" name="Microsoft-Windows-International-Core" processorArchitecture="amd64" publicKeyToken="31bf3856ad364e35" language="neutral" versionScope="nonSxS">
         <InputLocale>0409:00000409</InputLocale>
         <SystemLocale>en-US</SystemLocale>
         <UILanguage>en-US</UILanguage>
         <UILanguageFallback>en-US</UILanguageFallback>
         <UserLocale>en-US</UserLocale>
      </component>
      <component xmlns:wcm="http://schemas.microsoft.com/WMIConfig/2002/State" xmlns:xsi="http://www.w3.org/2001/XMLSchema-instance" name="Microsoft-Windows-Security-SPP-UX" processorArchitecture="amd64" publicKeyToken="31bf3856ad364e35" language="neutral" versionScope="nonSxS">
         <SkipAutoActivation>true</SkipAutoActivation>
      </component>
      <component xmlns:wcm="http://schemas.microsoft.com/WMIConfig/2002/State" xmlns:xsi="http://www.w3.org/2001/XMLSchema-instance" name="Microsoft-Windows-SQMApi" processorArchitecture="amd64" publicKeyToken="31bf3856ad364e35" language="neutral" versionScope="nonSxS">
         <CEIPEnabled>0</CEIPEnabled>
      </component>
      <component xmlns:wcm="http://schemas.microsoft.com/WMIConfig/2002/State" xmlns:xsi="http://www.w3.org/2001/XMLSchema-instance" name="Microsoft-Windows-Shell-Setup" processorArchitecture="amd64" publicKeyToken="31bf3856ad364e35" language="neutral" versionScope="nonSxS">
         <ComputerName>winhost</ComputerName>
      </component>
   </settings>
   <settings pass="oobeSystem">
      <component xmlns:wcm="http://schemas.microsoft.com/WMIConfig/2002/State" xmlns:xsi="http://www.w3.org/2001/XMLSchema-instance" name="Microsoft-Windows-Shell-Setup" processorArchitecture="amd64" publicKeyToken="31bf3856ad364e35" language="neutral" versionScope="nonSxS">
         <AutoLogon>
            <Enabled>false</Enabled>
         </AutoLogon>
         <OOBE>
            <HideEULAPage>true</HideEULAPage>
            <HideLocalAccountScreen>true</HideLocalAccountScreen>
            <HideOEMRegistrationScreen>true</HideOEMRegistrationScreen>
            <HideOnlineAccountScreens>true</HideOnlineAccountScreens>
            <HideWirelessSetupInOOBE>true</HideWirelessSetupInOOBE>
            <NetworkLocation>Work</NetworkLocation>
            <ProtectYourPC>1</ProtectYourPC>
            <SkipMachineOOBE>true</SkipMachineOOBE>
            <SkipUserOOBE>true</SkipUserOOBE>
         </OOBE>
         <RegisteredOrganization>Organization</RegisteredOrganization>
         <RegisteredOwner>Owner</RegisteredOwner>
         <DisableAutoDaylightTimeSet>false</DisableAutoDaylightTimeSet>
         <TimeZone>Eastern Standard Time</TimeZone>
         <UserAccounts>
            <AdministratorPassword>
               <Value>MyPassword</Value>
               <PlainText>true</PlainText>
            </AdministratorPassword>
         </UserAccounts>
      </component>
   </settings>
</unattend>
Run this command on the Windows VM
RUN SYSPREP FROM THE VSPHERE CONSOLE (NOT THROUGH SSH)
C:\> C:\Windows\System32\Sysprep\sysprep.exe /generalize /oobe /shutdown /unattend:<path_to_unattend.xml> The VM will shutdown when it is finished.
13. Make this VM into a template following these steps
Alternatively, you can use the following Git Repo to create the Windows Golden image:
 openshift
Creating Windows MachineSet
- Use the following template to create the Windows Machineset
apiVersion: machine.openshift.io/v1beta1
kind: MachineSet
metadata:
  labels:
    machine.openshift.io/cluster-api-cluster: <infrastructure_id>
  name: <windows_machine_set_name>
  namespace: openshift-machine-api
spec:
  replicas: 1
  selector:
    matchLabels:
      machine.openshift.io/cluster-api-cluster: <infrastructure_id>
      machine.openshift.io/cluster-api-machineset: <windows_machine_set_name>
  template:
    metadata:
      labels:
        machine.openshift.io/cluster-api-cluster: <infrastructure_id>
        machine.openshift.io/cluster-api-machine-role: worker
        machine.openshift.io/cluster-api-machine-type: worker
        machine.openshift.io/cluster-api-machineset: <windows_machine_set_name>
        machine.openshift.io/os-id: Windows
    spec:
      metadata:
        labels:
          node-role.kubernetes.io/worker: ""
      providerSpec:
        value:
          apiVersion: vsphereprovider.openshift.io/v1beta1
          credentialsSecret:
            name: vsphere-cloud-credentials
          diskGiB: 128
          kind: VSphereMachineProviderSpec
          memoryMiB: 16384
          network:
            devices:
            - networkName: "<vm_network_name>"
          numCPUs: 4
          numCoresPerSocket: 1
          snapshot: ""
          template: <windows_vm_template_name>
          userDataSecret:
            name: windows-user-data
          workspace:
             datacenter: <vcenter_datacenter_name>
             datastore: <vcenter_datastore_name>
             folder: <vcenter_vm_folder_path>
             resourcePool: <vsphere_resource_pool>
             server: <vcenter_server_ip>
Replace anything in <> with appropriate values.
To get infrastructure id, run the following oc command:
oc get -o jsonpath='{.status.infrastructureName}{"\n"}' infrastructure clusterLook at the existing worker machineset to get an idea on some of the settings
oc project openshift-machine-api
oc get machinesets
oc describe machineset <name of workermachineset>
FYI: I moved my ocpnodetemplate to the folder that was created as part of my Vsphere IPI install after doing the video. This made things consistent with the way the other machineset was configured.
Here is an example of how I configured my Windows MachineSet. I called mine windowsmachineset.yaml
apiVersion: machine.openshift.io/v1beta1
kind: MachineSet
metadata:
  labels:
    machine.openshift.io/cluster-api-cluster: hub-4dvh2
  name: hub-4dvh2-windows-worker
  namespace: openshift-machine-api
spec:
  replicas: 1
  selector:
    matchLabels:
      machine.openshift.io/cluster-api-cluster: hub-4dvh2
      machine.openshift.io/cluster-api-machineset: hub-4dvh2-windows-worker
  template:
    metadata:
      labels:
        machine.openshift.io/cluster-api-cluster: hub-4dvh2
        machine.openshift.io/cluster-api-machine-role: worker
        machine.openshift.io/cluster-api-machine-type: worker
        machine.openshift.io/cluster-api-machineset: hub-4dvh2-windows-worker
        machine.openshift.io/os-id: Windows
    spec:
      metadata:
        labels:
          node-role.kubernetes.io/worker: ""
      providerSpec:
        value:
          apiVersion: vsphereprovider.openshift.io/v1beta1
          credentialsSecret:
            name: vsphere-cloud-credentials
          diskGiB: 128
          kind: VSphereMachineProviderSpec
          memoryMiB: 16384
          network:
            devices:
            - networkName: "Private"
          numCPUs: 4
          numCoresPerSocket: 1
          snapshot: ""
          template: ocpnodetemplate
          userDataSecret:
            name: windows-user-data
          workspace:
             datacenter: CALLIGAN
             datastore: SSD2
             folder: /CALLIGAN/vm/hub-4dvh2
             resourcePool: /CALLIGAN/host/CALLIGAN/Resources
             server: <redacted>
2. Run the following command:
oc create -f windowsmachineset.yaml
3. You can monitor the progress by issuing the following commands:
# To see if node is ready
oc get machinesets
# To see if machine was created (it should go from provisioned to ready)
oc get machines
# To see if there are any errors in the openshift-machine-api namespace
oc get events -n openshift-machine-api
# To see if there are errors with the machine
oc describe machine <windows machinename>
# See if there are any errors with the windows machine-config operator
oc logs -f $(oc get pods -o jsonpath={.items[0].metadata.name} -n openshift-windows-machine-config-operator) -n openshift-windows-machine-config-operator
Troubleshooting commands are also available at:

Creating a Windows Container
This is based on steps from:
https://docs.openshift.com/container-platform/4.8/windows_containers/scheduling-windows-workloads.html
Here is a sample deployment that can be used to run a windows container
apiVersion: apps/v1
kind: Deployment
metadata:
  labels:
    app: win-webserver
  name: win-webserver
spec:
  selector:
    matchLabels:
      app: win-webserver
  replicas: 1
  template:
    metadata:
      labels:
        app: win-webserver
      name: win-webserver
    spec:
      tolerations:
      - key: "os"
        value: "Windows"
        Effect: "NoSchedule"
      containers:
      - name: windowswebserver
        image: mcr.microsoft.com/windows:2004
        imagePullPolicy: IfNotPresent
        command:
        - powershell.exe
        - -command
        - $listener = New-Object System.Net.HttpListener; $listener.Prefixes.Add('http://*:80/'); $listener.Start();Write-Host('Listening at http://*:80/'); while ($listener.IsListening) { $context = $listener.GetContext(); $response = $context.Response; $content='<html><body><H1>Red Hat OpenShift + Windows Container Workloads</H1></body></html>'; $buffer = [System.Text.Encoding]::UTF8.GetBytes($content); $response.ContentLength64 = $buffer.Length; $response.OutputStream.Write($buffer, 0, $buffer.Length); $response.Close(); };
        securityContext:
          windowsOptions:
            runAsUserName: "ContainerAdministrator"
      nodeSelector:
        beta.kubernetes.io/os: windows
Notes:
It may take a little while to download Windows container image. The 2004 image is around 6GB.
If running OCP 4.9, change the last-line (beta.kubernetes.io) to kubernetes.io
Also, adjust the container image to use based on version of Windows server that is deployed. This can be either mcr.microsoft.com/windows:2004 or mcr.microsoft.com/windows/servercore:ltsc2019