
ACM Add-Ons (VolSync)
Today, I'm going to write-up about a use-case that I get asked about a lot and this is in relation to backing up PVs (Persistent Volumes) from one cluster to another. This type of operation is good if you want to have a hot-standby site to fail-over to in the event of maintenance or some type of disaster.
There are multiple ways to tackle this problem. There is the OADP (Openshift Application Data Protection) Operator, there are ways to do this with ODF (Openshift Data Foundations) Disaster Recovery tooling, and some third-party solutions. The reason I am covering VolSync is because it is more light-weight than the ODF solution and doesn't require a full ODF cluster. In addition, this is part of ACM (Advanced Cluster Management) that I've been writing about recently.
My hub, spoke1 and spoke2 are all single node (SNO) OCP clusters running OCP version 4.11.25 and ACM 2.7.0. The ODF/LVM Operator is installed first on each of these clusters followed-by a partial install of ODF using the storage-class created by ODF/LVM (odf-lvm-vg1).
The application running on spoke1 is the blog-site you are currently reading (myopenshiftblog). It is a Ghost deployment. The latest version of Ghost has two persistent volumes to be backed-up. One if for the database and the other is for the content (mostly pictures/graphics). I will show how to backup one of those volumes.
In this article, the following topics will be covered:
A. Installing VolSync add-on
B. Setting up Metal-LB (more on this later)
C. Setting up ReplicationDestination CRD on Spoke2
D. Setting up ReplicationSource CRD on Spoke2
E. Mounting this as permanent volume in case of Disaster/Maintenance
Install VolSync Add-On
The steps that follow are based on the information shown in the following documents

My environment is bare-metal so I will be following the steps that are appropriate based on that use-case.
The YAML files I'm referencing are available here:
 kcalliga
- On the hub cluster, let's apply the ManagedClusterAddOn for Volysnc in the namespace of the spoke1 and spoke2 clusters.
apiVersion: addon.open-cluster-management.io/v1alpha1
kind: ManagedClusterAddOn
metadata:
  name: volsync
  namespace: spoke1
spec: {}oc apply -f mca-volsync-spoke1.yamlapiVersion: addon.open-cluster-management.io/v1alpha1
kind: ManagedClusterAddOn
metadata:
name: volsync
namespace: spoke2
spec: {}oc apply -f mca-volsync-spoke2.yaml2. These steps are optional and only for learning purposes
When you deploy these two YAML files, the first thing to check is to see if the status shows as true. It will show unknown shortly but should change to true shortly after.
oc get ManagedClusterAddOns -A|grep volsync
To see some other magic that happens in the background, you will see the VolSync operator automatically added to the spoke1/spoke2 clusters and some workloads will be created to support this on the hub, spoke1, and spoke2 clusters

On the hub cluster, there is a volsync controller running
oc get po -A|grep volsync
On spoke1/spoke2, the following pods are created, there is a controller manager running at this point.
oc get po -A|grep volsync
The VolSync Operator exposes two new CRDs which are called ReplicationSource and ReplicationDestination. In the follow-on text, you will see that ReplicationSource object will exist on the cluster (spoke1) that is the source of the persistent volume. ReplicationDestination object will be created on the destination cluster (spoke2).
Setting Up MetalLB Operator
In my environment, I have a constant VPN connection between all of my cluster end-points meaning they can all reach each other using 192.168.x.x IPs (RFC 1918). You will need to have some means for your clusters to communicate whether it is using SubMariner add-on (article on this to follow) or exposing a service via a LoadBalancer.
Since my environment is Bare-Metal, I can't create a LoadBalancer resource automatically as you can do in cloud-based environments such as AWS, GCP, Azure, etc. To support similar functionality in my cluster, I need to use the MetalLb Operator.
This operator will be used to expose the service used on the destination cluster (spoke2) which will have an SSH endpoint since I will be using Rsync for this demo. When I create the ReplicationDestation CRD, an address will be created based on the ip-pool that is setup in MetalLb.
- First, let's install MetalLB on the destination cluster (spoke2).
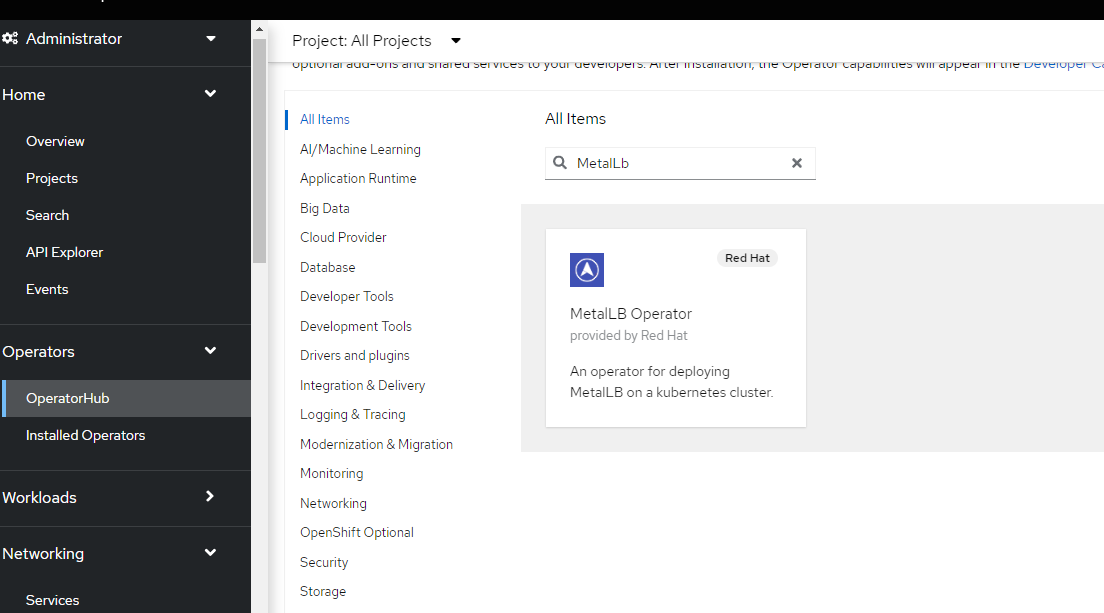
- On the Openshift Console, go to Operators --> OperatorHub and search for MetalLB
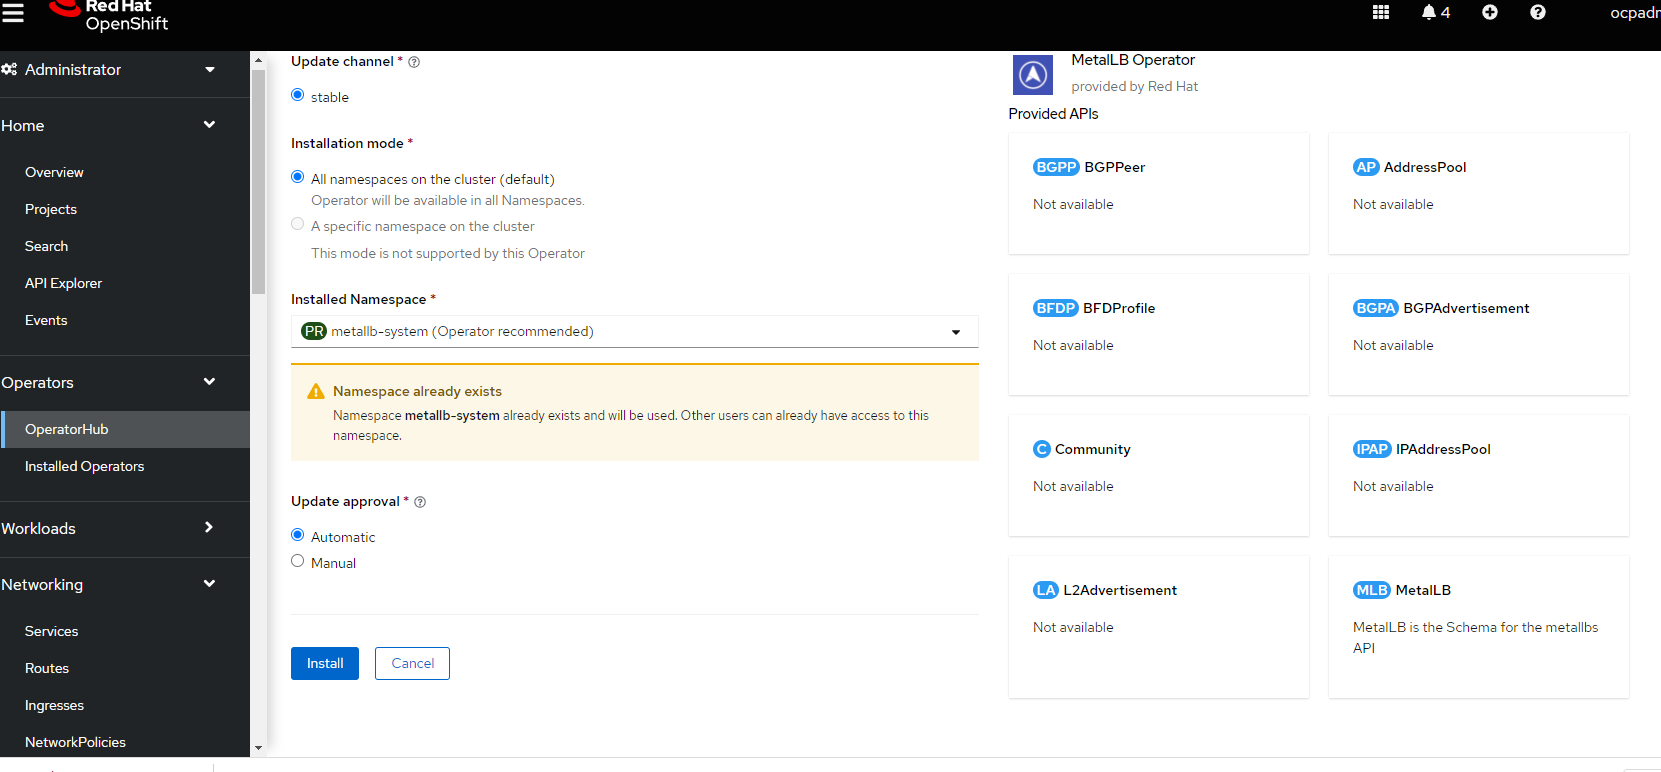
Click on Install. On the following screen you will accept the defaults (disregard the warning in my screenshot about the namespace already existing since I didn't fully clean-up the operator from previous run).
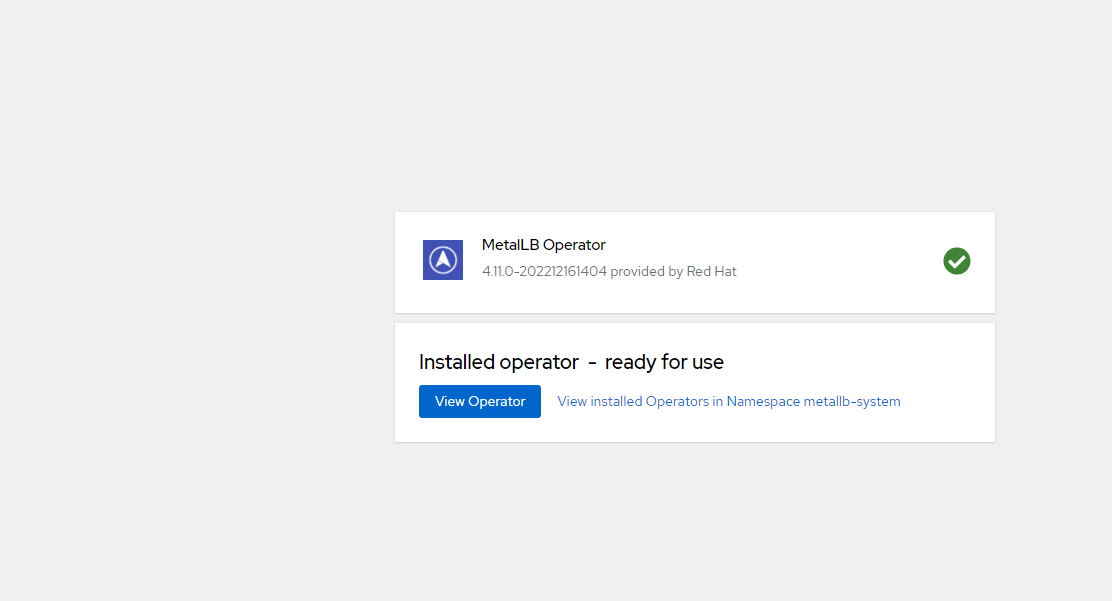
Click install Again and wait for the operator to finish installing.
When the MetalLb Operator is finished installing, it will say "Ready to Use"
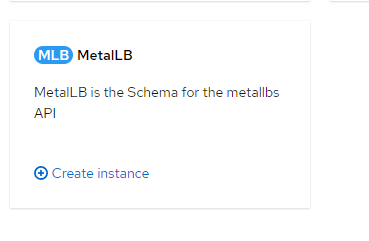
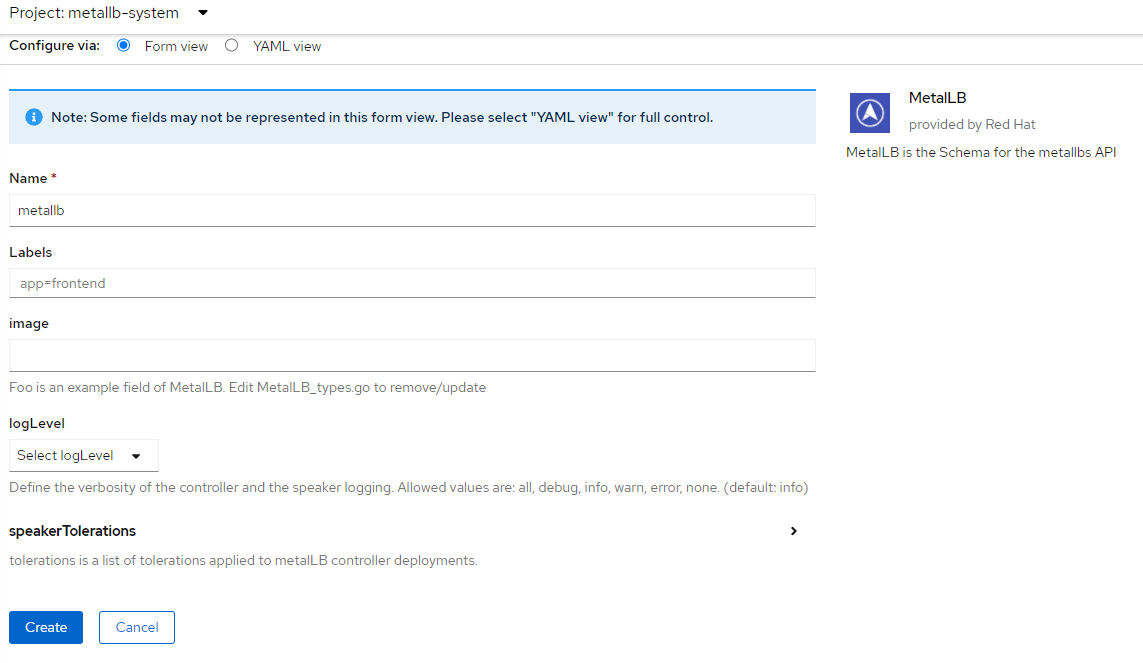
3. Next, we will create the MetalLB CRD. Go to Operators --> Installed Operators --> MetalLB, click on Create Instance for MetalLB
4. Accept the defaults on this screen and click "Create".
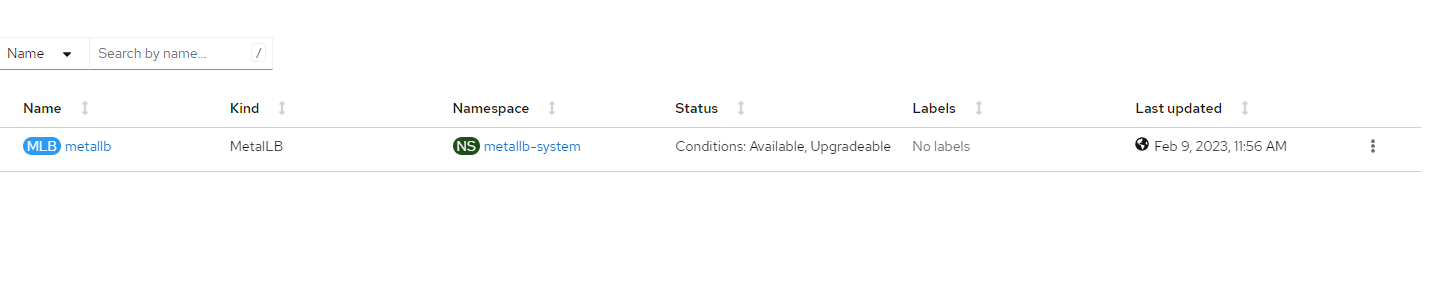
5. Shortly after creating the MetalLB CRD, the resource will show as "Available"
6. Now, let's see what was created on the spoke2 cluster. This step is optional.
oc project metallb-system
oc get po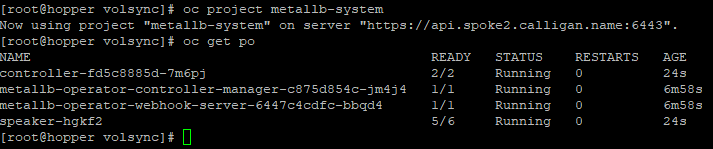
As you can see, 4 pods were created on spoke2.
7. From the same GitHub repo we were working on previously, there is an ip-pool.yaml file. For the range of IP addresses, make sure they are on the same subnet as your spoke2 SNO cluster and reachable from spoke1 cluster. If you only want to have port 22/SSH exposed, that is fine.
apiVersion: metallb.io/v1beta1
kind: IPAddressPool
metadata:
  namespace: metallb-system
  name: spoke2-ips
  labels:
spec:
  addresses:
  - 192.168.102.246-192.168.102.254
oc apply -f ip-pool.yamlWhen you apply this configuration, you may see that some of the LoadBalancer services associated with noobaa/s3 bucket storage in openshift-storage namespace now have some IP addresses from the pool that was just created.
oc get svc -A|grep openshift-storage|grep LoadBalancer
There is one additonal step in relation to MetalLB which is related to the layer2 advertisement. I will show the impact of not having this applied in the next section.
Setting up ReplicationDestination CRD on Spoke2
The ReplicationDestination will be setup first because we need some information from this object to create the ReplicationSource such as IP address, SSH key, etc.
The ReplicationDestination resource on spoke2 looks as follows
apiVersion: volsync.backube/v1alpha1
kind: ReplicationDestination
metadata:
  name: myopenshiftblog
  namespace: myopenshiftblog
spec:
  rsync:
    serviceType: LoadBalancer
    copyMethod: Snapshot
    capacity: 20Gi
    accessModes: [ReadWriteOnce]
    storageClassName: odf-lvm-vg1
volumeSnapshotClassName: odf-lvm-vg1oc create -f replicationdestination.yamlThis is creating some resources to house the the backup of the persistent volumes from the source (spoke1).
My backup resource was created in the namespace/project called myopenshiftblog, so this is where the resulting resources will be shown. Adjust per your environment.
oc project myopenshiftblog
oc get po
oc get svc
You should see a pod running called volsync-rsync..... and a service that is exposing an externalIP based on the range of IPs that are being exposed by the MetalLB load-balancer.

The externalIP will be needed when creating the replicationsource CRD on spoke1.
It's also important to note that the external IP is only listening on port 22 which is needed for SSH. It won't ping from anywhere.
To verify that the externalIP is reachable from spoke1, you could run the following command
telnet 192.168.102.249 22
In my case, it wasn't reachable. One reason for this is because there is another component for MetalLB needed to announce this IP.
A L2 advertisement CRD needs to created since my 192.168.102.249 IP does not know how to route ( we never gave it a gateway).
apiVersion: metallb.io/v1beta1
kind: L2Advertisement
metadata:
  name: l2advertisement
  namespace: metallb-system
spec:
  ipAddressPools:
   - spoke2-ips
Reference the ip address pool that was created earlier (spoke2-ips in my case)
Now, let's check the result of the telnet command again from spoke1.
telnet 192.168.102.249 22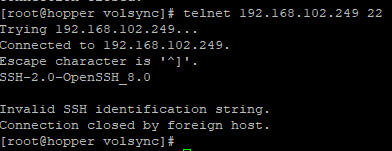
That looks better
There is one last piece of information we need in order to create the replicationSource CRD on spoke1. This is the public key of the destination endpoint so that spoke1 can connect without a password.
On spoke2, run the following commands (adjust based on your setup) to get the address (this is another way) and the contents of the SSH key
oc get replicationdestination <destination> -n <destination-ns> --template={{.status.rsync.address}}`
oc get replicationdestination <destination> -n <destination-ns> --template={{.status.rsync.sshKeys}}
Based on these 2 outputs, we know that the IP address is 192.168.102.249 and the secret that contains the info is called volsync-rsync-dst-src-myopenshiftblog
Let's get the contents of this secret and save to a text file
oc get secret volsync-rsync-dst-src-myopenshiftblog -o yamlThis secret will contain the private/public key for the source cluster and the public key of the destination to be used.
Here is some sample output of the secret
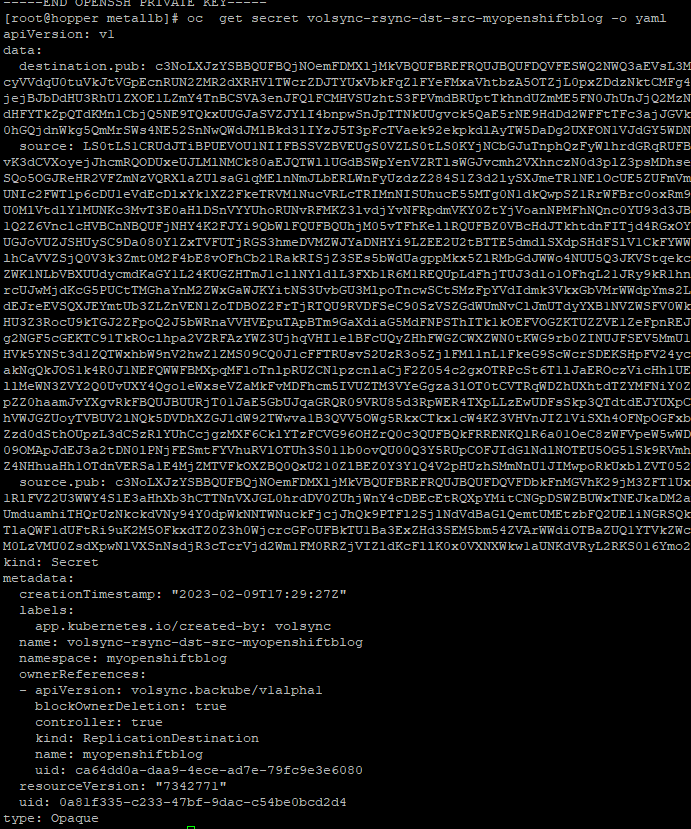
You will want to make some edits to this file in your text editor to remove the ownerReferences, resourceVersion, and uid. This will be put into the spoke1 cluster shortly.
Setting up ReplicationSource CRD on Spoke1
Let's first use the contents of the secret that we just put into our editor and apply it to the source cluster (spoke1). Make sure everything we create is in the same namespace. I called my namespaces the same on both clusters (myopenshiftblog)
Here is a sample of the formatted secret. This will be randomly generated each time. Keep the same secret name as well.
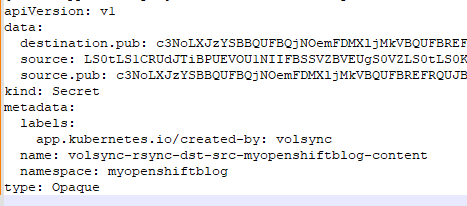
oc create -f volsync-rsync-dst-src-myopenshiftblog.yamlNow, let's create the replicationSource CRD
apiVersion: volsync.backube/v1alpha1
kind: ReplicationSource
metadata:
  name: myopenshiftblog
  namespace: myopenshiftblog
spec:
  sourcePVC: myopenshiftblog-content
  trigger:
    schedule: "*/3 * * * *" #/*
  rsync:
    sshKeys: volsync-rsync-dst-src-myopenshiftblog
    address: 192.168.102.249
    copyMethod: Snapshot
    storageClassName: odf-lvm-vg1
volumeSnapshotClassName: odf-lvm-vg1oc create -f replicationsource.yamlWhen this resource is created, a few things will happen:
Since this job runs every 3 minutes, you should a sync job start
oc get replicationsource
This shows when the last sync started, the duration, and when the next sync will occur.
Let's look on the spoke2 cluster to see if the snapshot/PV exists. I will use the console for this example.
The VolumeSnapshot object exists. This can be used for restoration purposes
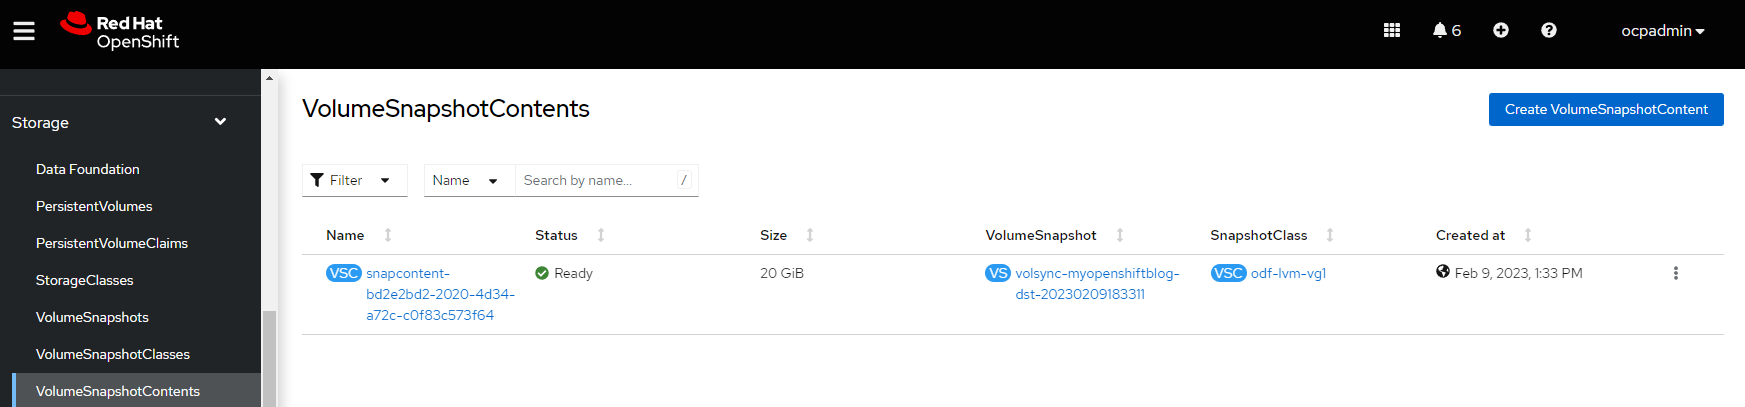
The Persistent Volume Claim and PV exist which contain the source data

Let's look inside the destination pod on spoke2 which mounts the persistent volume as /data
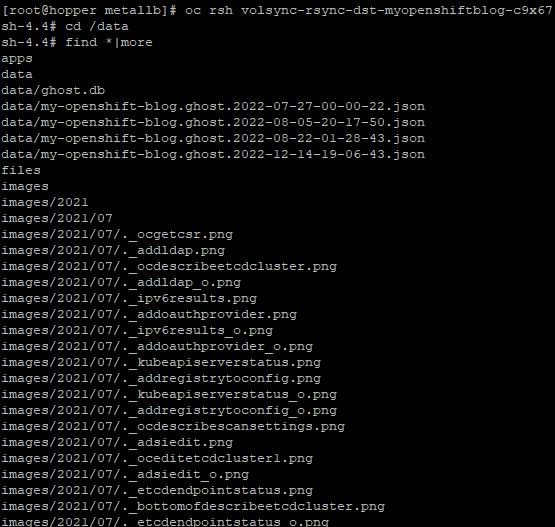
This shows the PV was copied and there is data there
Mounting this as permanent volume in case of Disaster/Maintenance
If you want to use this volumesnapshot on spoke2 to create a permanent volume, here is a sample YAML and steps to follow.
apiVersion: v1
kind: PersistentVolumeClaim
metadata:
  name: <pvc-name>
  namespace: <destination-ns>
spec:
  accessModes:
    - ReadWriteOnce
  dataSource:
    kind: VolumeSnapshot
    apiGroup: snapshot.storage.k8s.io
    name: <snapshot_to_replace>
  resources:
    requests:
storage: 20GiAdjust this file as appropriate and apply.
This Persistent Volume can then be claimed by your workloads (deployments/pods/etc).
Thanks for reading. Much more content to come soon including how to do this same operation using Sub-Mariner which will allow us to use ClusterIP resources (instead of LoadBalancer) to allow services to be reachable across multiple clusters .
Other References:
backube