
Red Hat Openshift AI 3.3 Installation
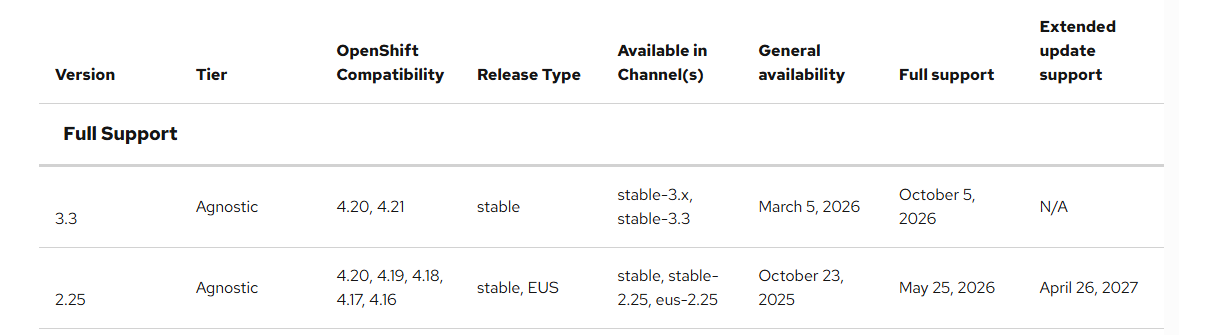
RHOAI 3.3 was released last week (3/5/26) and there are lots of new features. My intention is to cover them at a high-level in this article and then follow-on articles based on the most important and exciting features.
There have been some major architecture changes related RHOAI such as using hardware profiles for using accelerators/GPUs in workbenches and the name of the route of the RHOAI console changing to data-science-gateway.apps.<yourdomain>. This is just a few of the changes I've noticed when working with this so far.
Due to the architectural changes, a direct upgrade from RHOAI 2.25 to 3.x is not available at this time. It is recommended to do this as a fresh install or an upgrade (from 3.2 release).
This article assumes you have RHOAI 2.25.x installed and you need to remove it first. If this is a new install, simply follow the steps shown in "Adding RHOAI 3.x section".
If you are currently on version 2.25, , I will show how to remove these components and install 3.3 fresh. My cluster is at version 4.20.15 as of this writing.
Removing RHOAI 2.25
You can find this same documentation at the link below:
https://docs.redhat.com/en/documentation/red_hat_openshift_ai_self-managed/3.3/html/installing_and_uninstalling_openshift_ai_self-managed/uninstalling-openshift-ai-self-managed_uninstalling-openshift-ai-self-managed#uninstalling-openshift-ai-self-managed-using-cli_uninstalling-openshift-ai-self-managed
- On the oc command-line, run the following commands:
oc create configmap delete-self-managed-odh -n redhat-ods-operatoroc label configmap/delete-self-managed-odh api.openshift.com/addon-managed-odh-delete=true -n redhat-ods-operator- After you run these 2 commands, the RHOAI operator won't be installed anymore.
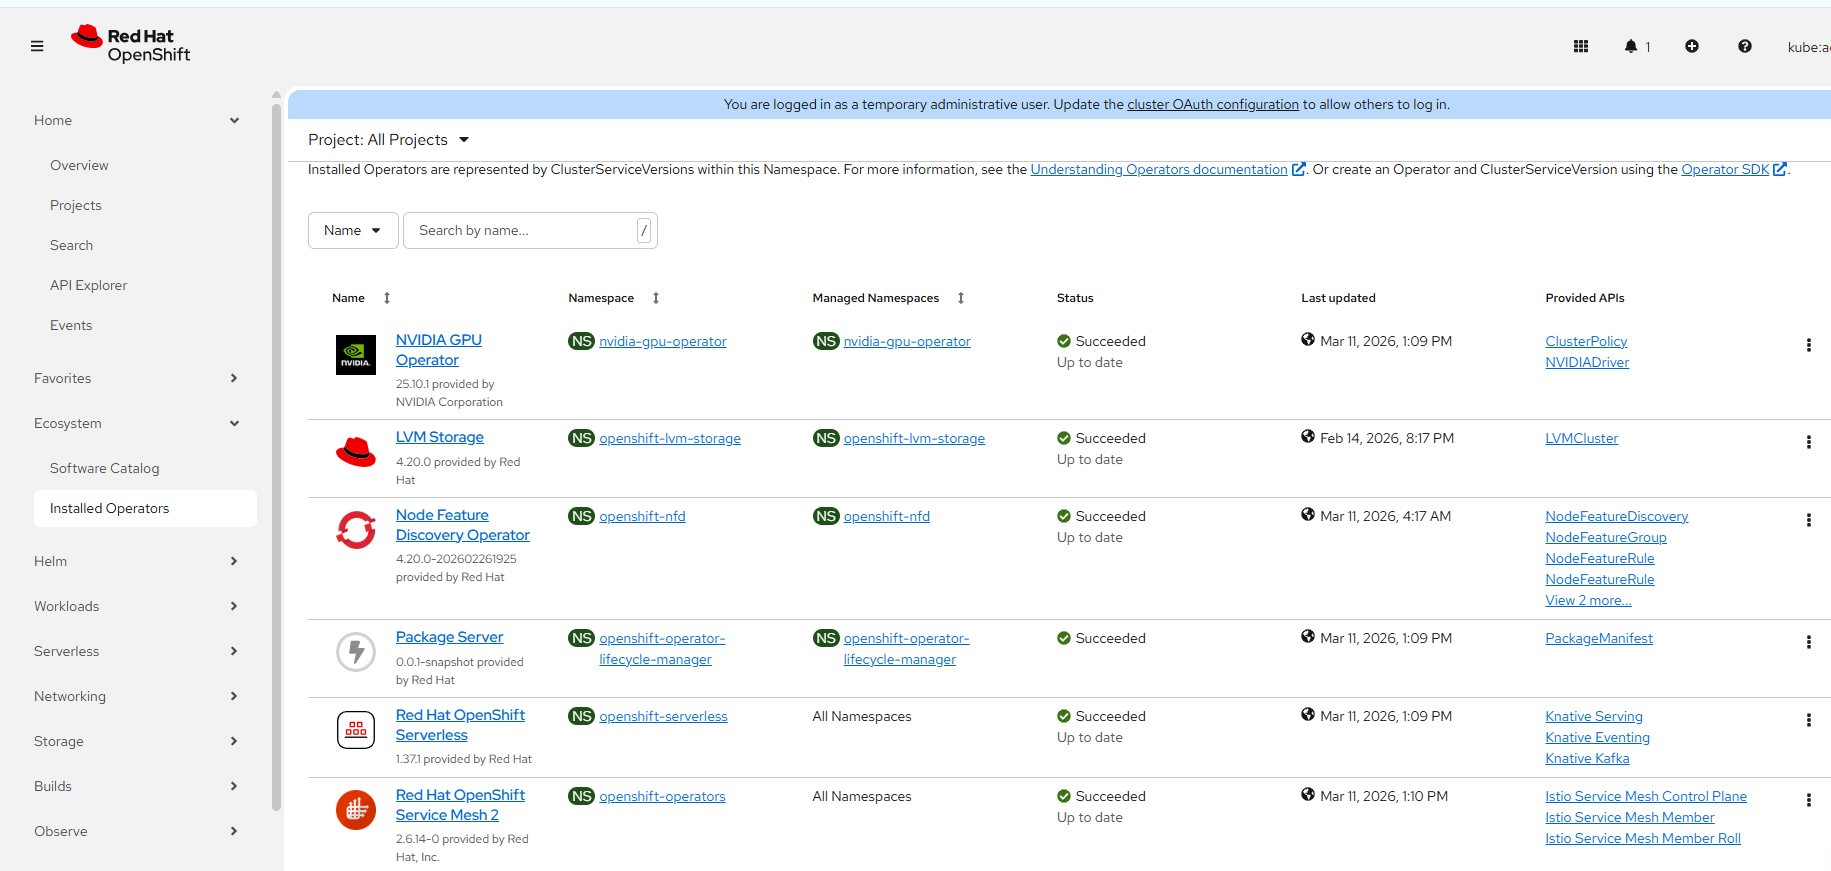
To confirm, go to Ecosystem --> Installed Operators. Select "All Projects".
Notice that the RHOAI operator is missing from this list.
Adding RHOAI 3.x
# To get list of CRDs that are installed (and any leftover stuff from old installed) related to RHOAI
for i in `oc get crd|grep opendatahub|awk '{print $1}'`; do echo $i;  oc get $i -A; done;
# Removing redhat-ods-operator namespace/project
oc delete project redhat-ods-operator- There are 2 pre-requisites (in addition to the ServiceMesh 2 and Serverless) that were needed to do the base install of RHOAI 3.3. This is installing the "Cert Manager" operator and "Jobset Operator"
A. Installing "Cert Manager" Operator.
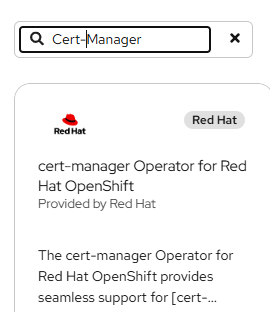
Under Ecosystem – > Software Catalog search for "Cert-Manager"
Install it with all of the default options and click install.
B. Search for Jobset Operator under Ecosystem – > Software Catalog and install in the same manner with all default options.
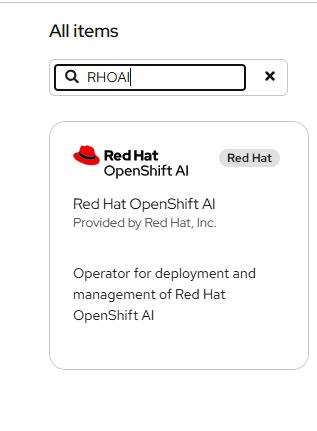
- To install RHOAI Operator, go to Ecosystem -->Software Catalog and search for "RHOAI".
This part of the install will l0ok the same as previous but a new channel option will appear.
- Before clicking install, Select the "Stable-3.x" channel and install the current version. It is 3.3.0 as of the time of this writing.
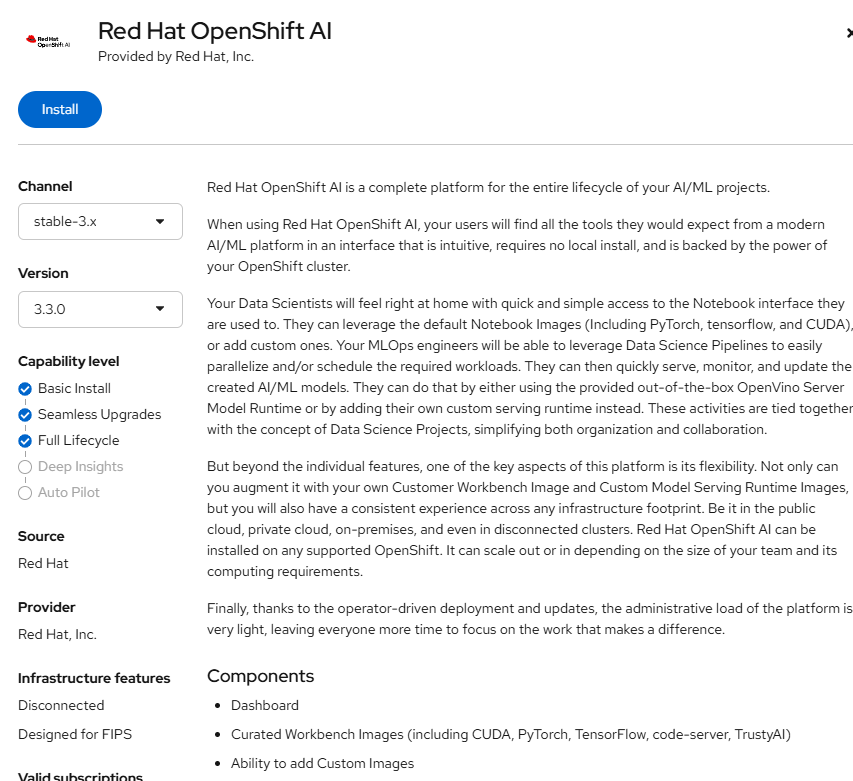
- Click "Install"
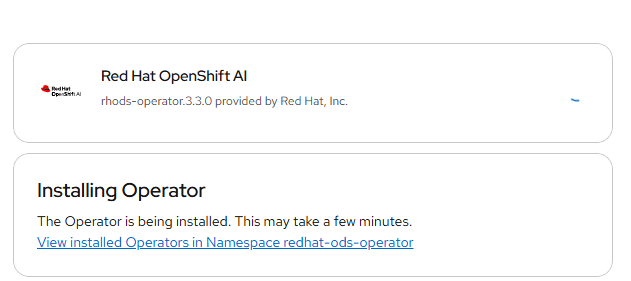
- You may see that the redhat-ods-operator namespace/project still exists if you uninstalled the 2.x version of the operator. This is ok.

Click "Install" You will see a progress indicator as you would with any of the operator installs.
- Now, you should see an option to create a DataScienceCluster CRD as shown below.
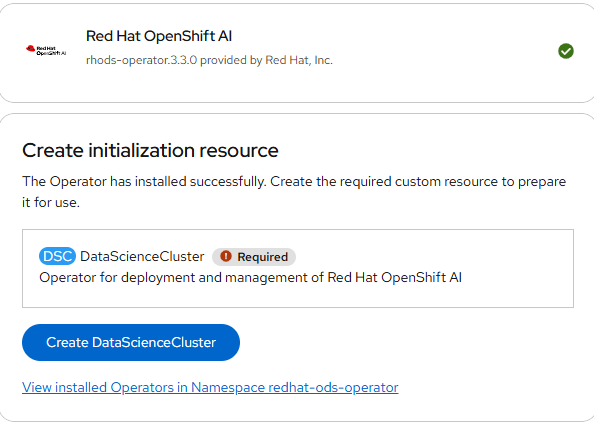
The following snippet shows the default components that are removed or Managed. Each of these will be covered in a follow-on post.
spec:
  components:
    kserve:
      managementState: Managed
      modelsAsService:
        managementState: Removed
      nim:
        managementState: Managed
      rawDeploymentServiceConfig: Headless
    modelregistry:
      managementState: Managed
      registriesNamespace: rhoai-model-registries
    feastoperator:
      managementState: Managed
    trustyai:
      eval:
        lmeval:
          permitCodeExecution: deny
          permitOnline: deny
      managementState: Managed
    aipipelines:
      argoWorkflowsControllers:
        managementState: Managed
      managementState: Managed
    ray:
      managementState: Managed
    kueue:
      defaultClusterQueueName: default
      defaultLocalQueueName: default
      managementState: Removed
    workbenches:
      managementState: Managed
      workbenchNamespace: rhods-notebooks
    mlflowoperator:
      managementState: Removed
    dashboard:
      managementState: Managed
    trainer:
      managementState: Managed
    llamastackoperator:
      managementState: Removed
    trainingoperator: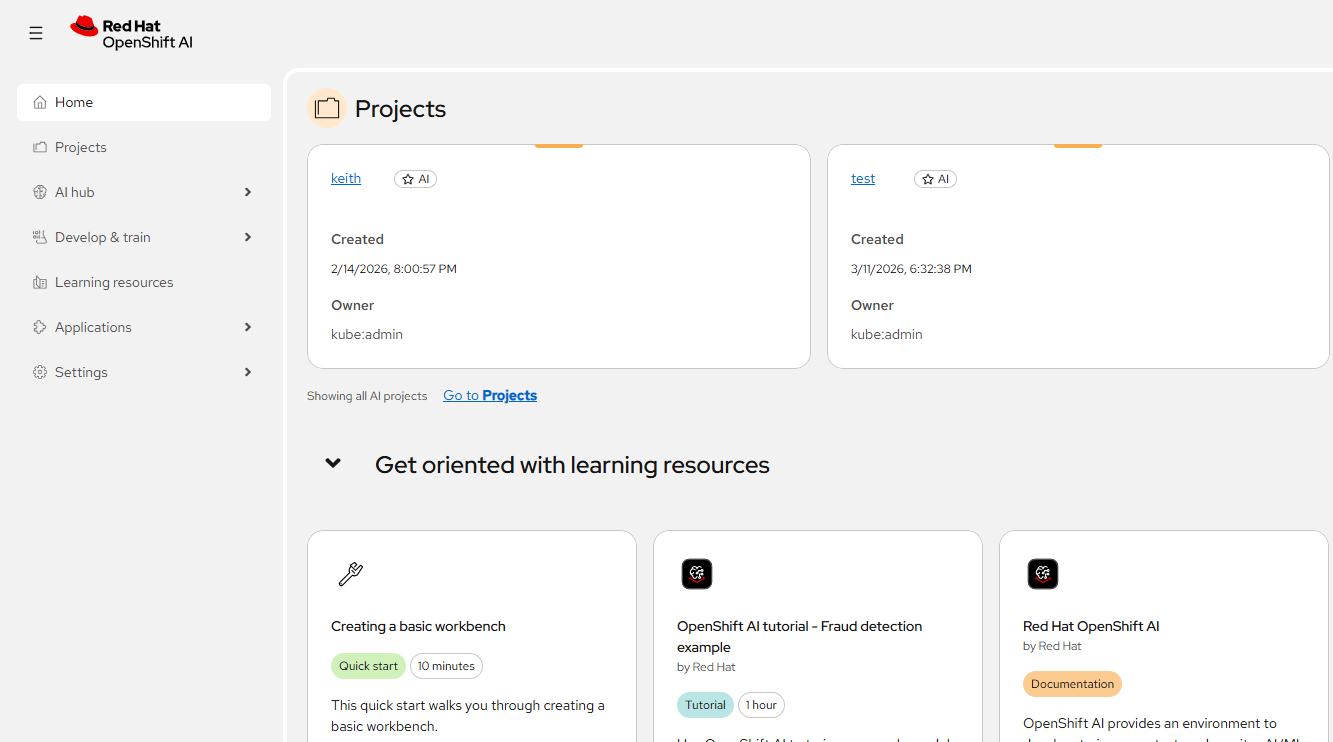
managementState: Removed- Shortly after the DataScienceCluster object is initiated, the dashboard will be available at data-science-gateway.apps.<DOMAIN>
Hardware Profiles
One other change is the way accelerators/GPUs are assigned to workloads. Hardware Profiles are used now. This example below will be related to Workbenches.
NOTE: The steps to install/configure Node Feature Discovery Operator and Nvidia GPU Operator have not changed significantly. Follow the steps in the article below if you need help with this.
https://myopenshiftblog.com/enabling-nvidea-gpu-in-rhoai-openshift-data-science/
The following snippet assumes an NVIDIA GPU. I have a consumer-grade RTX-4080 in my lab.
# gpu-hardware-profile.yaml
apiVersion: infrastructure.opendatahub.io/v1
kind: HardwareProfile
metadata:
  annotations:
    opendatahub.io/dashboard-feature-visibility: '[]'
    opendatahub.io/disabled: 'false'
    opendatahub.io/display-name: nvidia-gpu-4080
  name: nvidia-gpu-4080
  namespace: redhat-ods-applications
spec:
  identifiers:
    - defaultCount: 1
      displayName: NVIDIA GPU
      identifier: nvidia.com/gpu
      maxCount: 1
      minCount: 1
      resourceType: Accelerator
    - defaultCount: 2
      displayName: CPU
      identifier: cpu
      maxCount: 4
      minCount: 1
      resourceType: CPU
    - defaultCount: 4Gi
      displayName: Memory
      identifier: memory
      maxCount: 8Gi
      minCount: 2Gi
      resourceType: Memory
Apply this using "oc apply"
Now when creating a Workbench, the hardware profile (Nvidia-GPU-4080 in this case) will appear as a choice.
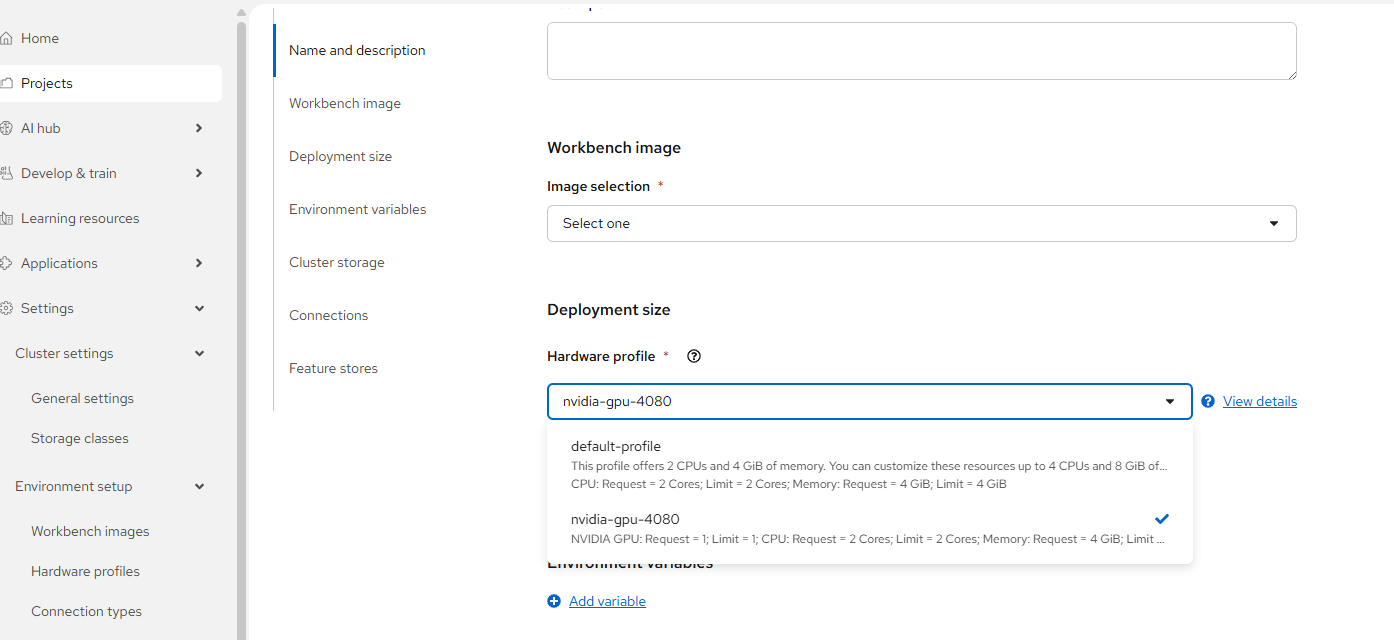
You can also use this to control the sizing of cpu/memory that is allocated to this workbench.