Red Hat Advanced Cluster Security (RHACS) Part 2/2
As a follow-on to this article, I wanted to continue with showing some of the most-used features of RHACS.
These include the following:
A. Scanning Images and Nodes for Vulnerabilities
B. Monitoring Workload and Cluster Compliance
C. Creating Security Policies
A. Scanning Images and Nodes for Vulnerabilities
After installing RHACS, there is one change that needs to be made to the Central resource to enable vulnerability scanning.
- Go to Ecosystem --> Installed Operators --> RHACS --> and click on Central tab.
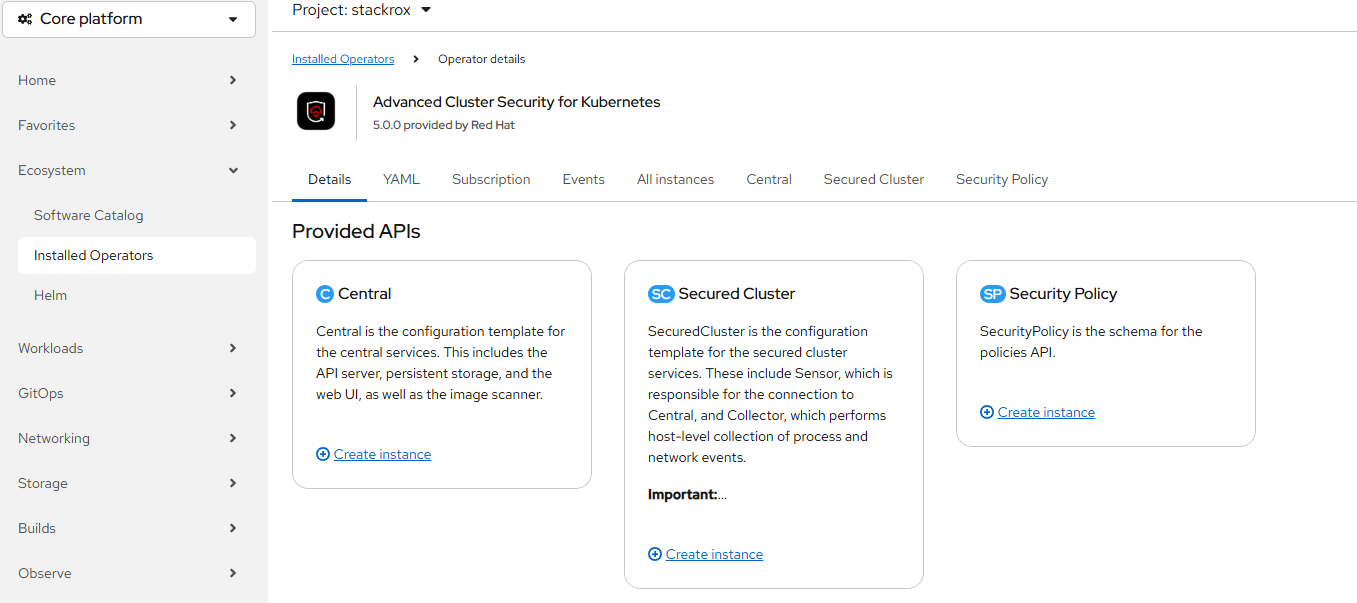
Click on the three ellipses and select "Edit Central"
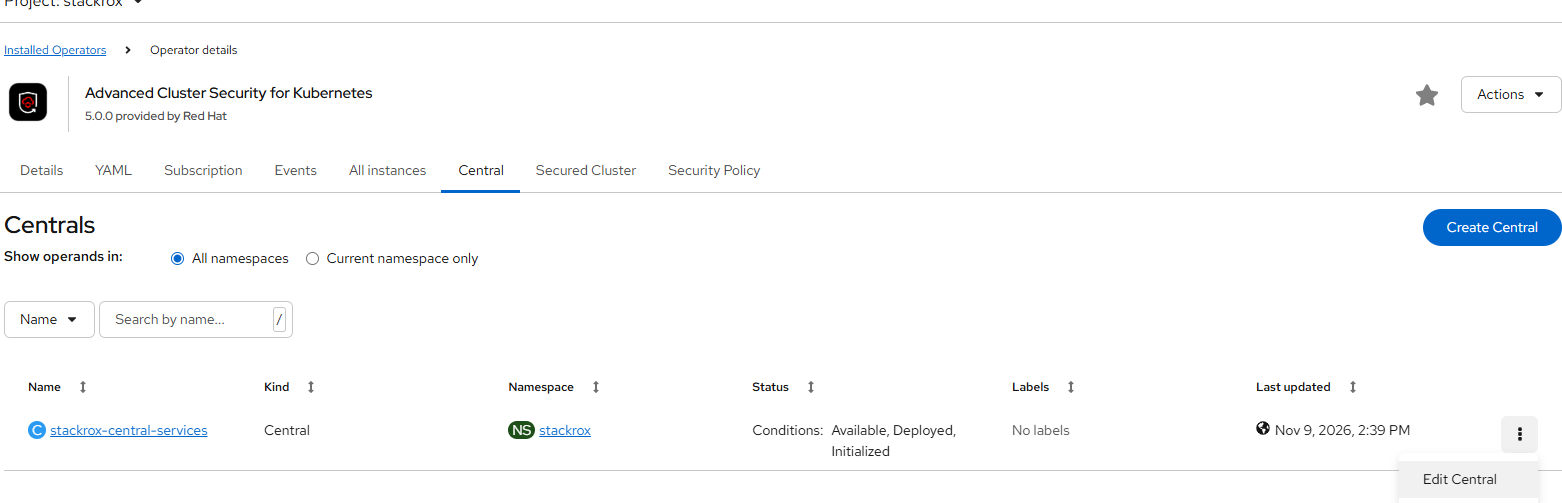
Make the change highlighted below to enable scannerV4
Click "Save"
- Now, edit the SecuredCluster resource under the RHACS operator. See the highlighted section.
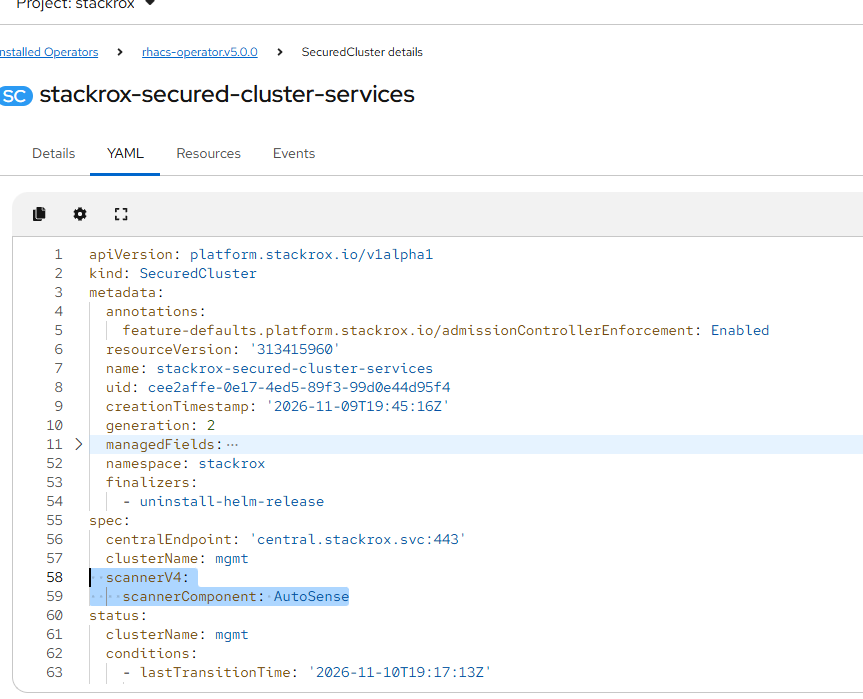
Hit "Save".
- To enable node-scanning, run the following commmands
# On Central

oc -n stackrox set env deployment/central ROX_NODE_INDEX_ENABLED=true ROX_SCANNER_V4=true

# On each cluster to be monitored

oc -n stackrox set env deployment/sensor ROX_NODE_INDEX_ENABLED=true ROX_SCANNER_V4=true

oc -n stackrox set env daemonset/collector ROX_NODE_INDEX_ENABLED=true ROX_SCANNER_V4=true
- To verify, wait a few minutes and look at the logs on the central pod on central cluster to verify that node scanning is working as shown in the screenshot below.

You will need to wait at least 5-10 minutes for node scan results to appear.
Go to Vulnerability Management --> Dashboard and ensure that there is new scan time (after you have performed steps 3 and 4 above).
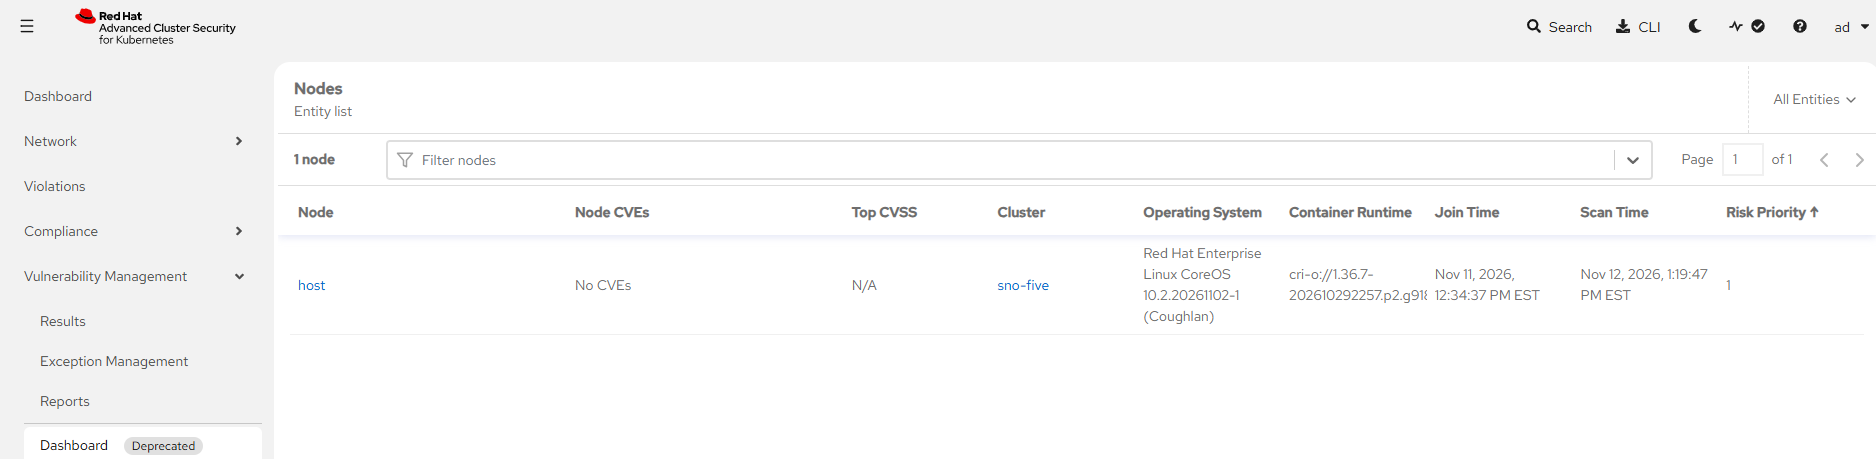
There are no CVEs at the node-level 😄
- In the Central dashboard, under Vulnerability Management --> Results, you will start to see results.
They are divided as follows:
User Workloads: Operators or other non-platform specific workloads
Platform: OCP specific workloads
Nodes: Scans of the RHCOS node-level
Virtual Machines: For OCP-Virt VMs (not used in this example)
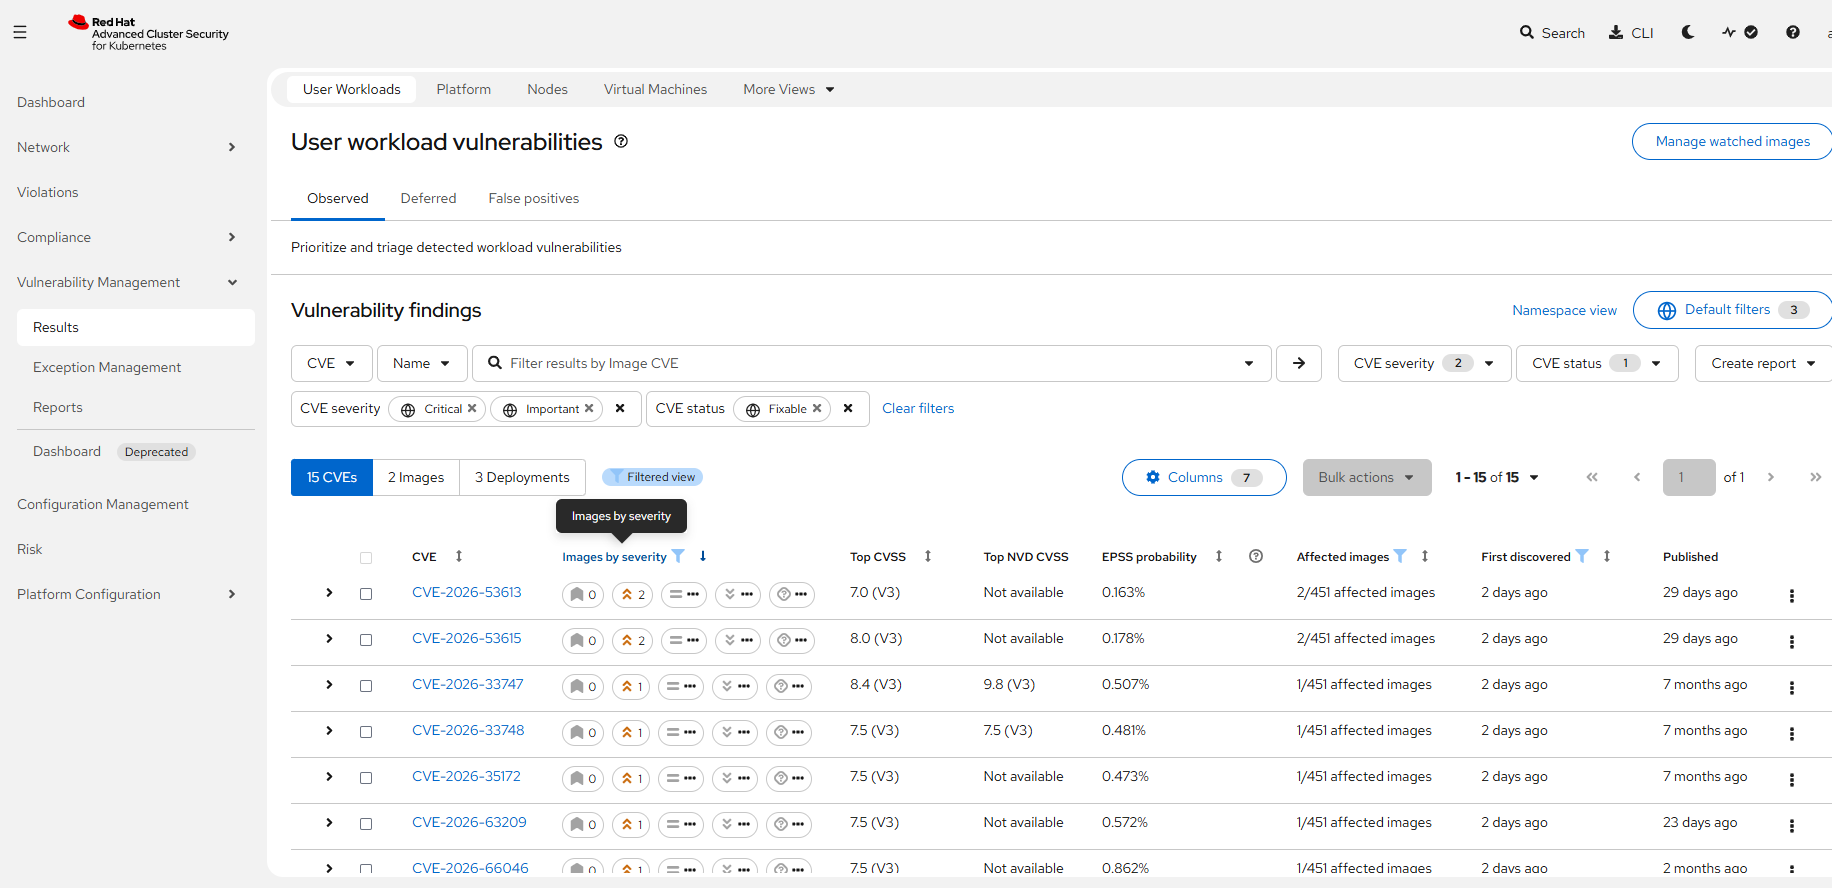
Note: Don't worry about the high counts in this screenshot—out-of-the-box scans flag everything from optional hardening tips to dormant container libraries and legacy Linux checks that don't fit OpenShift's immutable RHCOS model. Anyone in security knows CVE hunting is a never-ending job with no finish line, so the real goal here isn't hitting zero—it's using RHACS policies to cut through the noise. Out of the box, RHACS is extra chatty by design, leaving it up to each company's security team to tune the policies and decide what is actually valid for their environment and use cases.
B. Monitoring Workload and Cluster Compliance
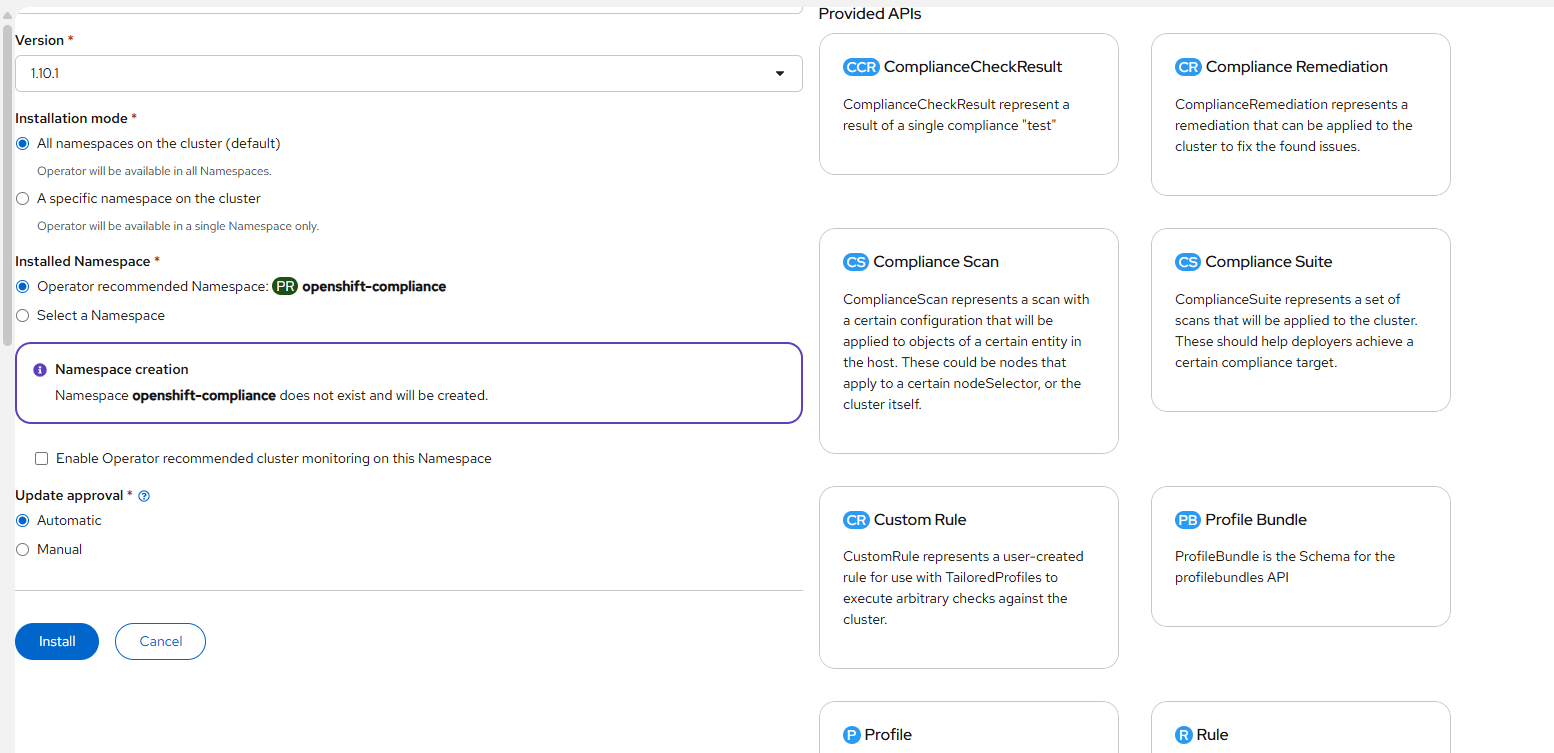
- Let's install the Openshift Compliance Operator on the monitored/secured cluster.
On the OCP web console for the monitored/securedcluster,
Go to Ecosystem -->Software Catalog and search for "Compliance"
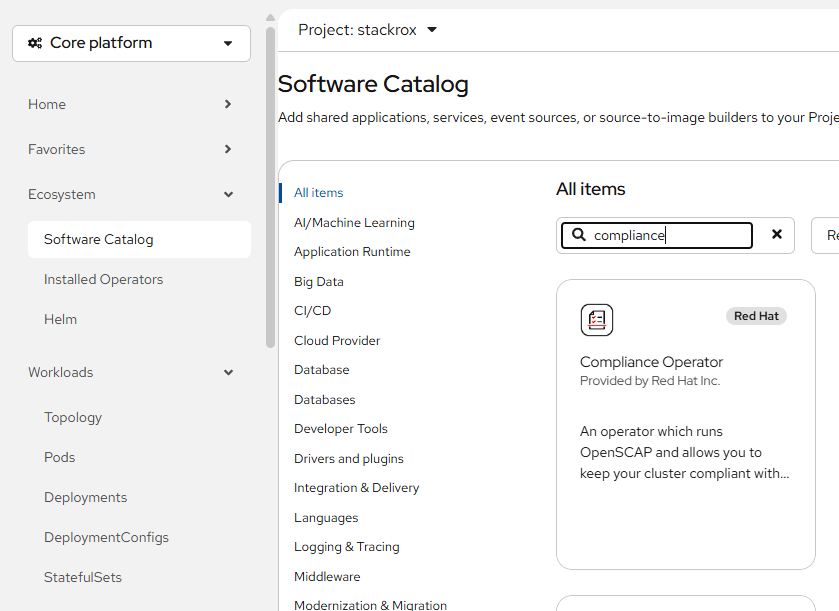
Click on the "Compliance Operator" box and click "Install".
On the resulting screen, accept the default settings and click "Install" again.
- Let's go back to the Central console.
Go to Compliance --> Openshift Schedules
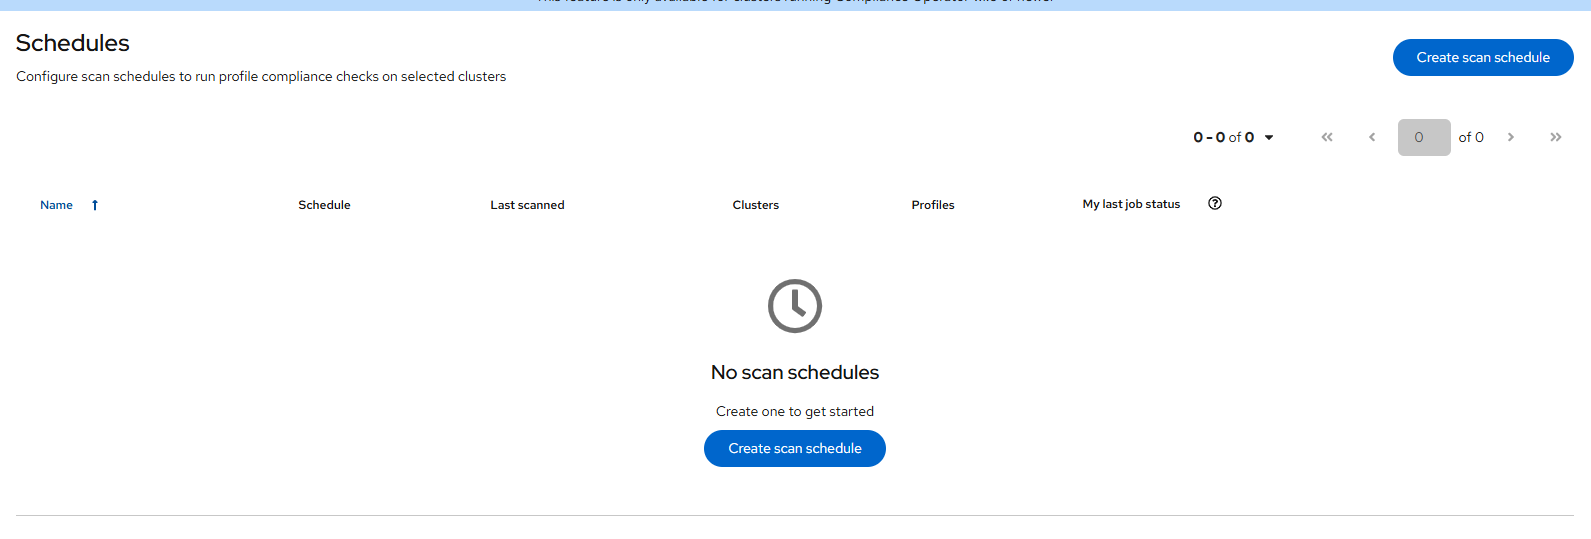
Click "Create scan schedule"
- Use the following parameters:
Name: cis-scan
Description: cis-scan
Schedule: daily
Time: Anytime
We will run this manually
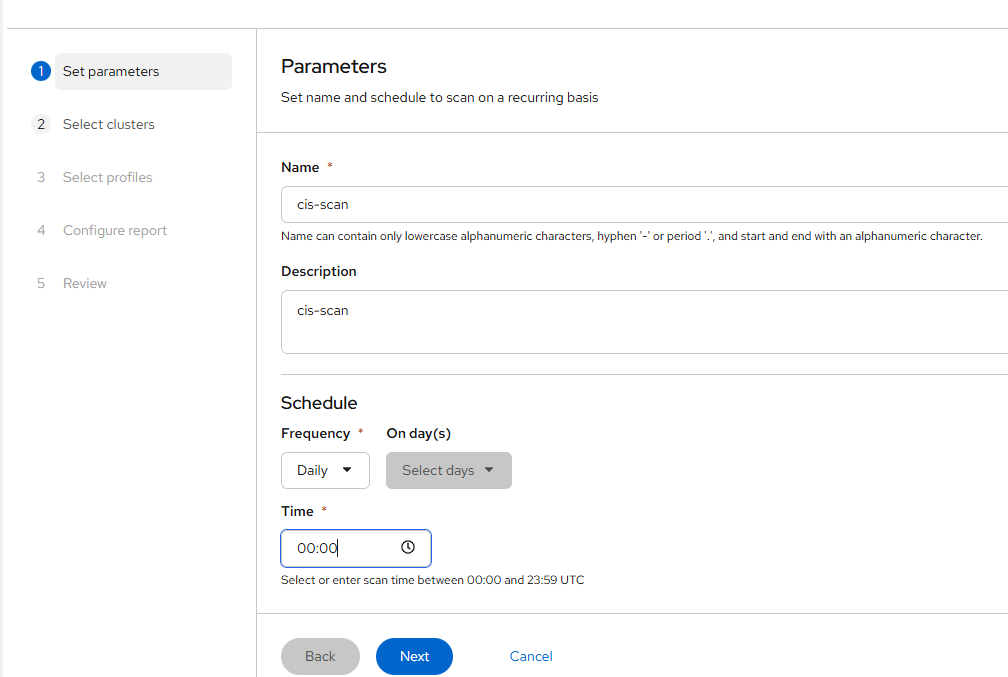
Hit "Next"
Select the cluster to be scanned
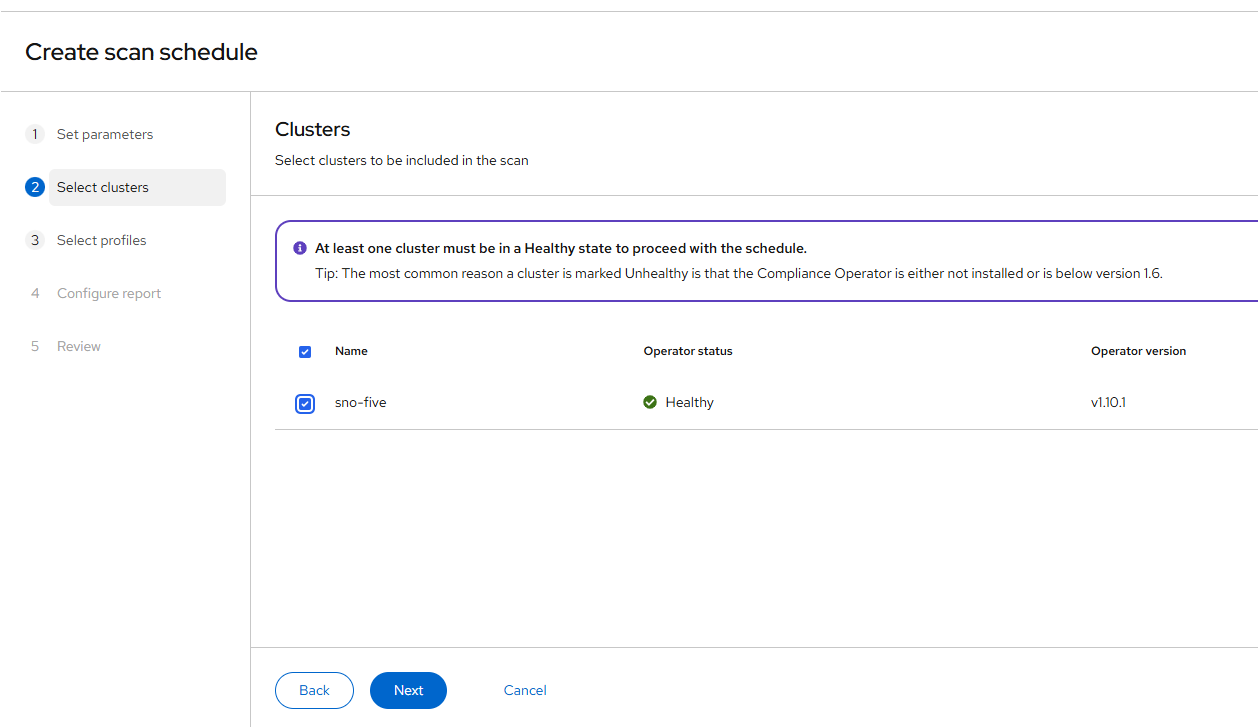
Click "Next"
Select ocp4-cis and ocp4-cis-node from the list
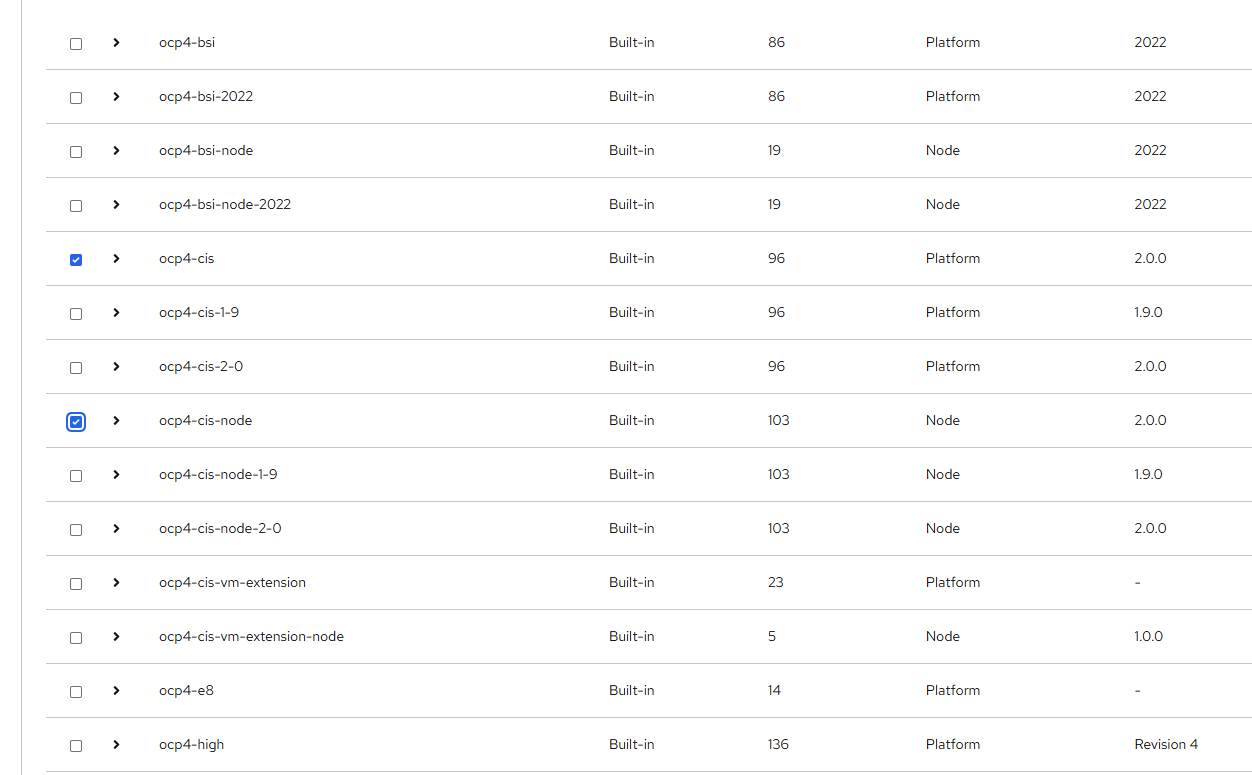
Click "Next on the three remaining screens.
A scan will run automatically after this scan schedule is saved.
- View the results
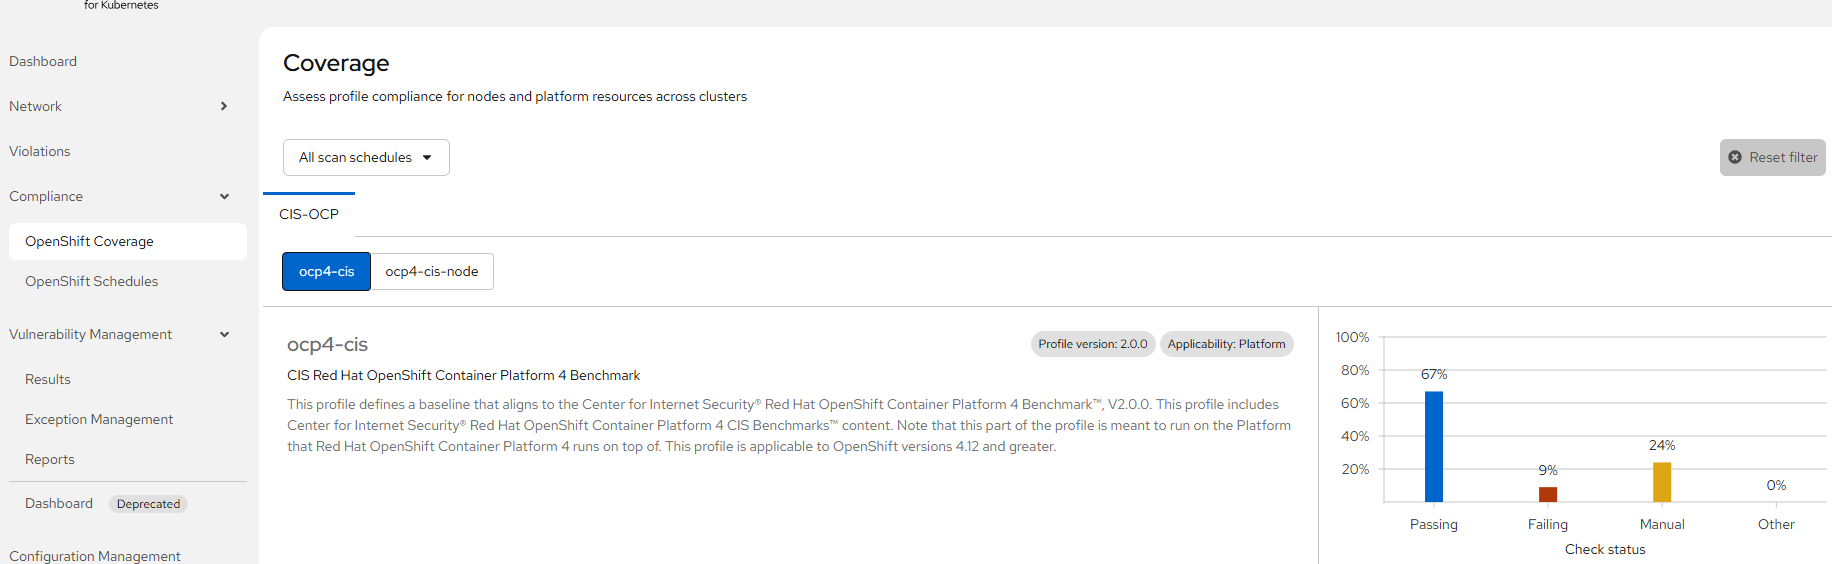
ocp4-cis
ocp4-cis-node
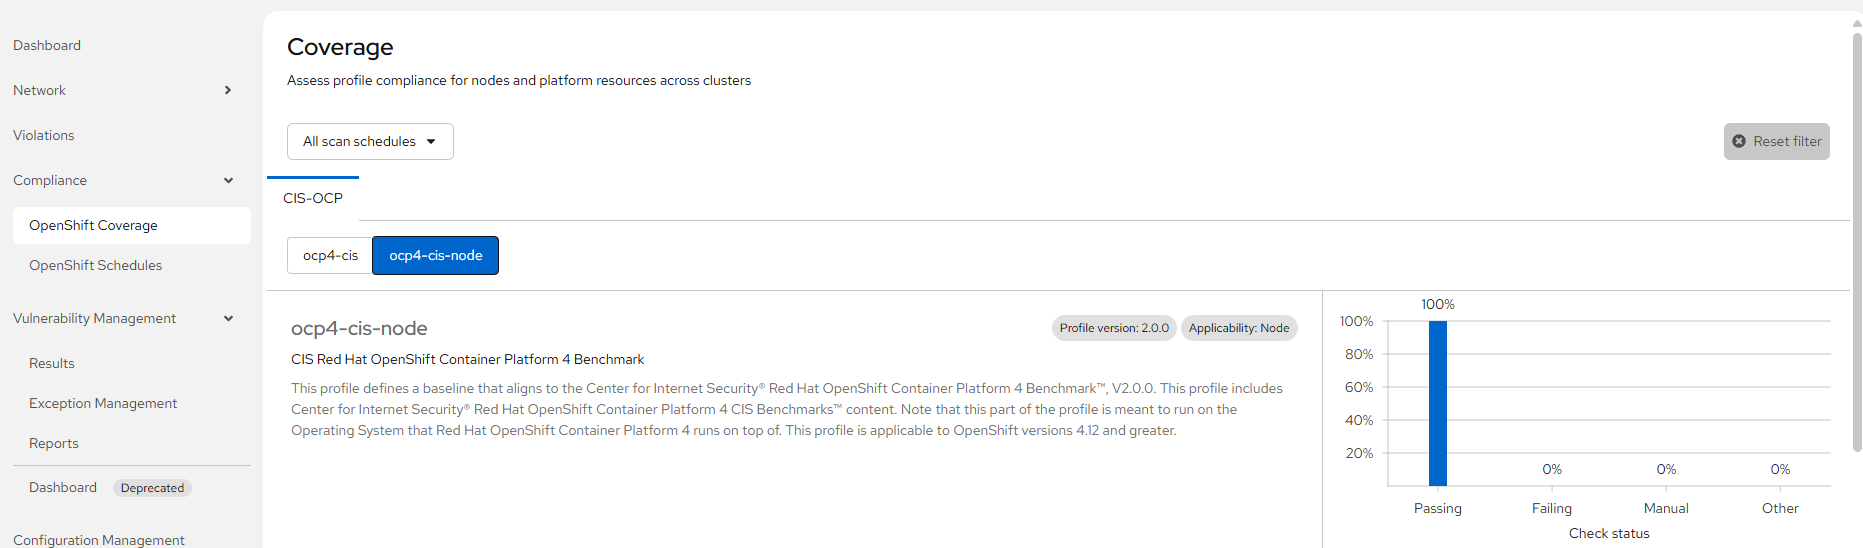
There are some failures on the platform-side which have been found to be false positives and some others that need manual checks but the node side shows 100% passing score.
C. Creating Security Policies
This section of the tutorial will focus on the Platform Management --> Policy Management section of the Central dashboard.
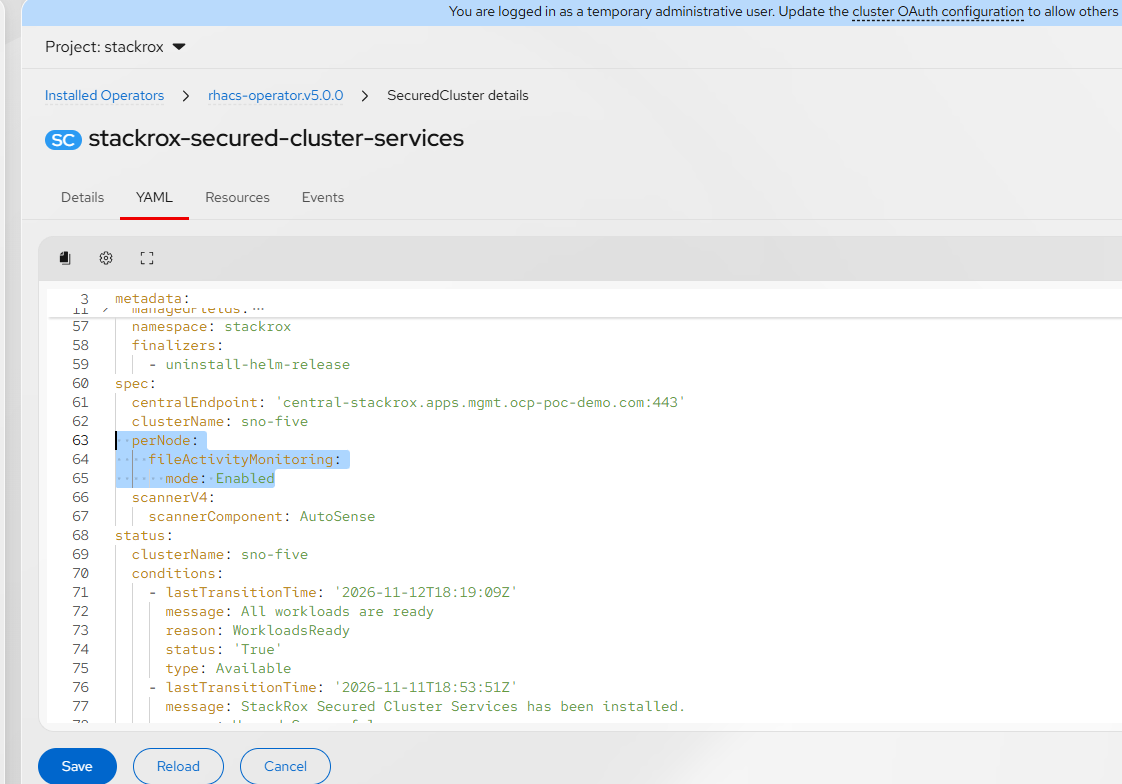
To ensure file-activity monitoring is enabled properly, check the SecuredCluster resource YAML under Ecosystem --> Installed Operators --> Red Hat Advanced Cluster Security for Kubernetes --> SecuredCluster.
See the highlighted section below for what needs to exist.
Before we get into a working example, it is important to understand some of the categories of the policies and also the lifecycle phase that these policies run in.
Categories organize RHACS policies by the specific type of security threat, compliance standard, or operational risk they detect:
- Anomalous Activity: Detects unexpected runtime behavior inside containers, such as interactive shell spawns, unauthorized package manager execution, or unusual process activity.
- Cryptocurrency Mining: Flags known crypto-mining binaries, command-line arguments, and outbound network connections to mining pools inside running workloads.
- DevOps Best Practices: Checks build and deployment configurations against operational hygiene standards, such as avoiding
:latestimage tags, defining resource limits, and configuring health probes. - Docker CIS: Evaluates container images and runtime configurations against Center for Internet Security (CIS) benchmarks, such as ensuring containers do not run as
rootor expose SSH ports. - File Activity Monitoring: Tracks real-time file creations, modifications, deletions, and renames on critical host node or container paths to detect unauthorized tampering.
- Kubernetes: Audits Kubernetes deployment specs and RBAC settings for risky configurations like privileged containers, host namespace sharing (
hostPID/hostNetwork), or overly permissive service accounts. - Kubernetes Events: Monitors live Kubernetes API audit events—such as
oc exec, pod attachments (oc debug), and port-forwarding—to catch interactive administrative or attacker actions as they occur. - Network Tools: Alerts when network reconnaissance or packet-capture utilities (such as
nmap,netcat, ortcpdump) are baked into a container image or invoked at runtime.
Lifecycle stages determine when in the container pipeline RHACS evaluates a policy and what enforcement actions it can take:
- Build stage policies can inspect only images built in the build pipeline, using criteria related to the image registry, content, vulnerability data and scanning process. When enforced, policy violations may be used to fail the build.
- Deploy stage policies can inspect workload configurations and/or their images. They are evaluated while creating or updating a workload resource and re-evaluated periodically or on demand. When enforced, policy violations result in rejection of workload admission or update, or if admitted, workload replicas being scaled down to zero.
- Build+Deploy stage policies are a convenient option to inspect images in both the build pipeline and during workload admission and apply enforcement to either or both stages in a single policy.
- Runtime policies inspect either workload activity, Kubernetes resource operations, or node activity, depending on the event source selected. When enforced, runtime policies that inspect workload activity terminate the offending pod. Enforcement is not available for the policies inspecting sensitive operations via the Kubernetes audit log or node activity.
Event sources (Runtime lifecycle only) define what telemetry stream RHACS inspects to evaluate a Runtime policy:
- Deployment: Watches real-time activity inside running pods—including process executions, network connections, container file modifications,
oc execsessions, and port-forwarding. - Audit logs: Inspects Kubernetes API server audit records to catch sensitive API requests such as reading Secrets or ConfigMaps, altering RBAC rules, or performing privileged cluster actions.
- Node: Monitors host-level activity directly on the underlying OpenShift (RHCOS) node filesystem via File Activity Monitoring to detect unauthorized tampering with critical host files.
Let's create a simple policy that will ensure that no changes can be made to the SSH configuration at the node-level. As we should know, only the core user is allowed to login through SSH using the public key that was provisioned when the cluster was instantiated.
Node File Scan Policy
- Go to Platform Configuration --> Policy Management
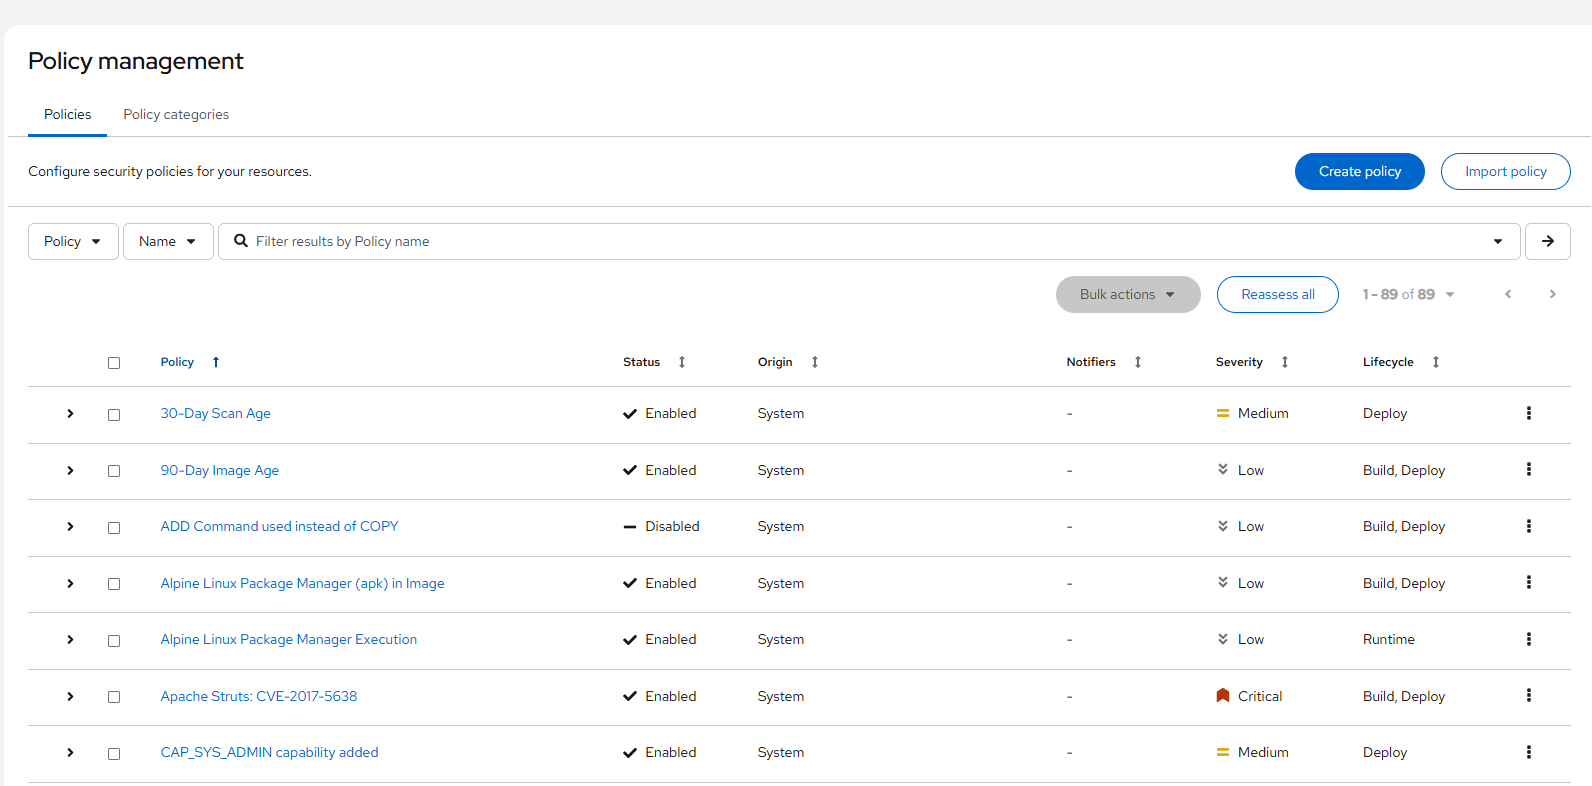
Click "Create Policy"
- Fill in the following values
Name: var-test
Severity: Low
Category: File Activity Monitoring
Description: Monitor for files created or modified in /var/test directory
You can leave everything else blank for now
Hit Next
Lifecycle Stage: Runtime
Event Source: Node
Hit Next
File Path: /var/test/*
File Operation: Open (Writeable) + Create
Accept the defaults for the rest
This is how the "Policy Criteria" should look on the confirmation screen
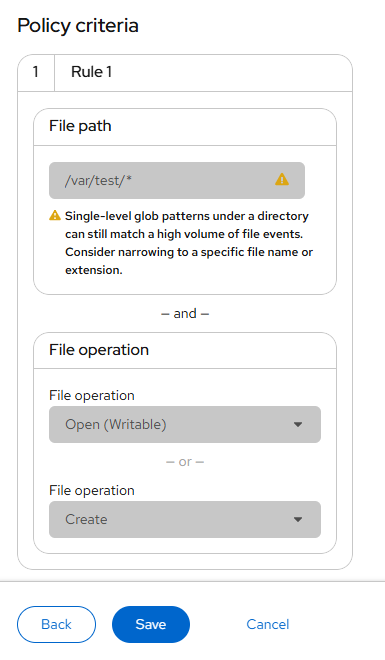
Hit "Save"
- Now, you must SSH into one of the nodes (SNO cluster here) and run the following commands.
sudo -i
mkdir /var/test
echo "test" > /var/test/testfile
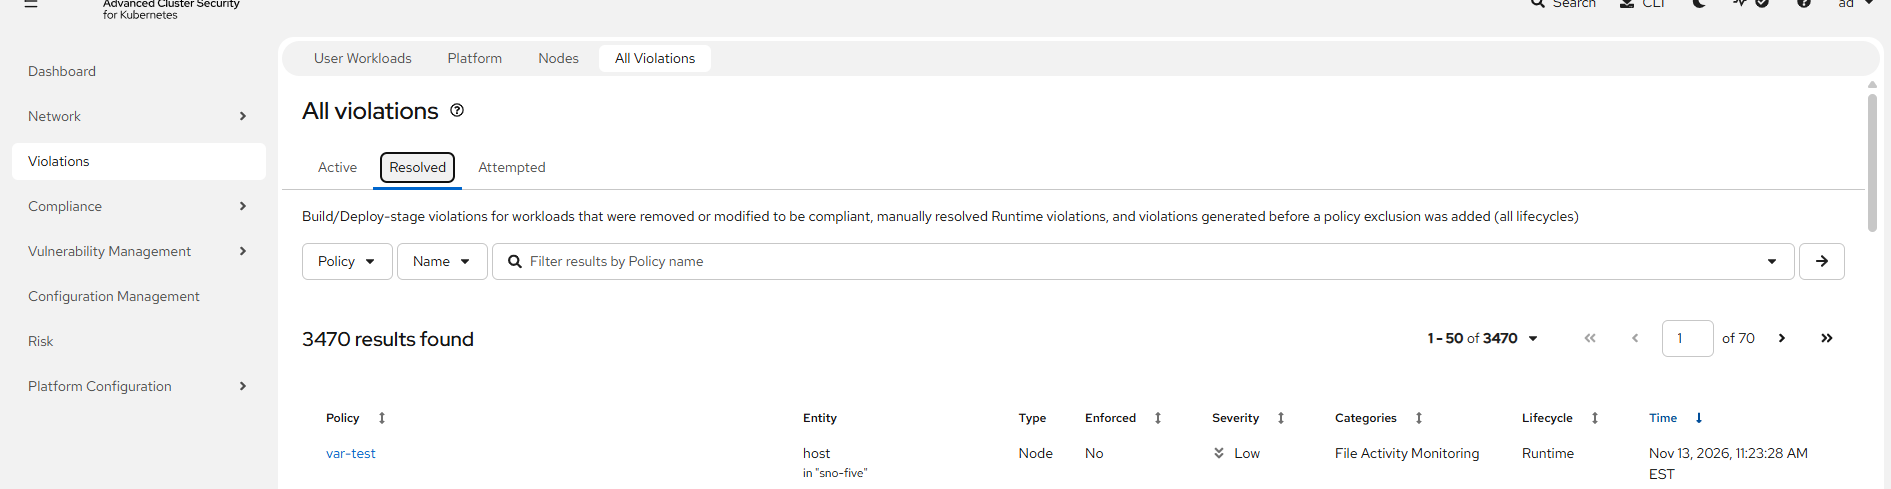
- Go to Violations menu
Go to "All Violations" tab
Select "Resolved"
You should see the var-test policy fired.
That is all for now. More to come