
From Hugging Face to OpenShift: Serving Granite7B Models
This post will continue with where I left off on the Red Hat OpenShift AI blog series. We already covered some topics such as workbenches and pipelines. I even provided a high-level overview of data science and MLOps fundamentals.
Now, I will cover Model Serving. Here is what I will show you here:
A. Getting Token from Hugging Face
B. Downloading the Models
C. Serving the Model on Nvidia GPU
D. Frontend for Nvidia GPU Model
E. Serving on Regular CPU
F. Accessing GUI on CPU Model
The GitHub repository used for this walkthrough is located at:
https://github.com/kcalliga/granite-kserve-example
This repo is organized in the following folders:
convert_to_gguf - Not used here but another way to convert model to appropriate format to run on llama CPU runtime.
frontend - This folder contains the commands and files needed serve the front-end for the vLLM (Nvidia) model.
hugging_face_to_local_s3 - Python scripts to download files needed for vLLM (Nvidia) that will contain full directory contents for Granite7B model.
yaml - Contains the vLLM (Nvidia) and llama (cpu) model serving components.
A. Getting Token from Hugging Face
In this exercise, the Granite 7B model will be used. This is very similar to the model used in InstructLab. In order to download this model, you will need to get a token from Hugging Face.
- Go to the main Hugging Face web page and click on the "Sign-Up" link and follow the prompts/process.
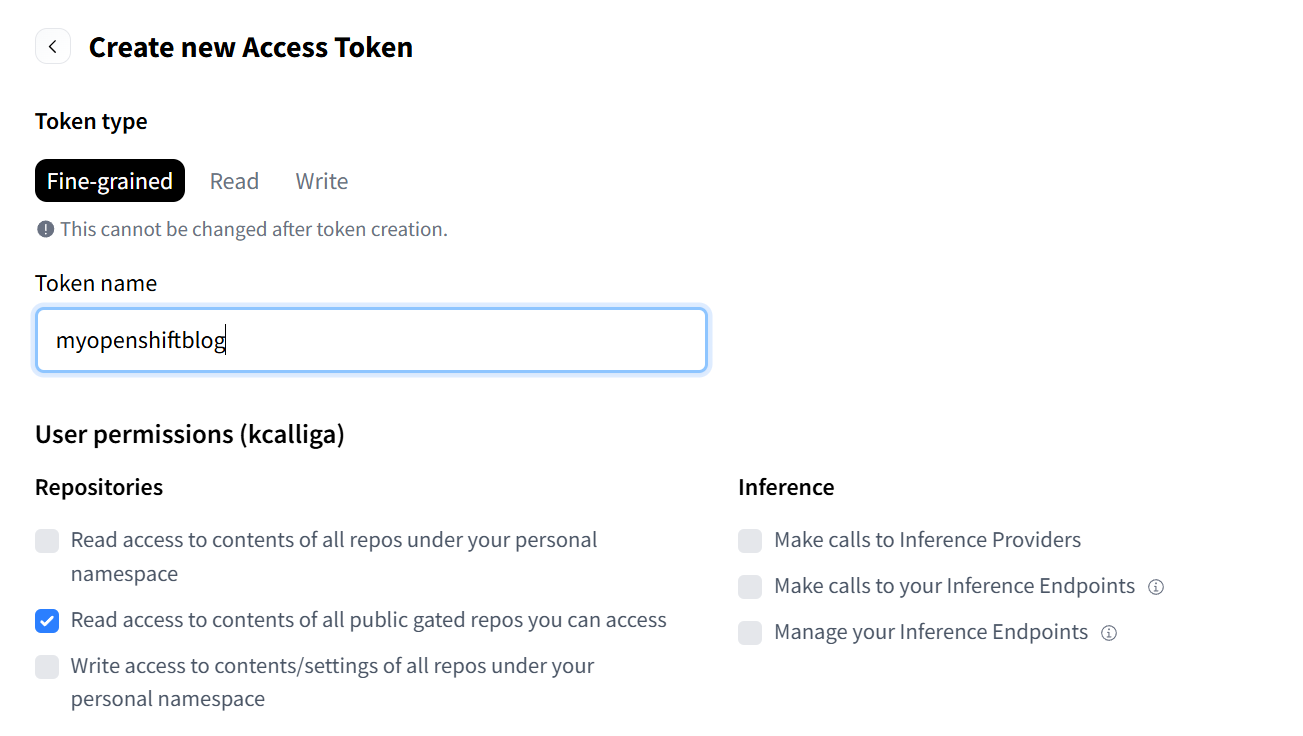
- Once logged in, go to the access tokens page at https://huggingface.co/settings/tokens
- Click on "Create New Token."
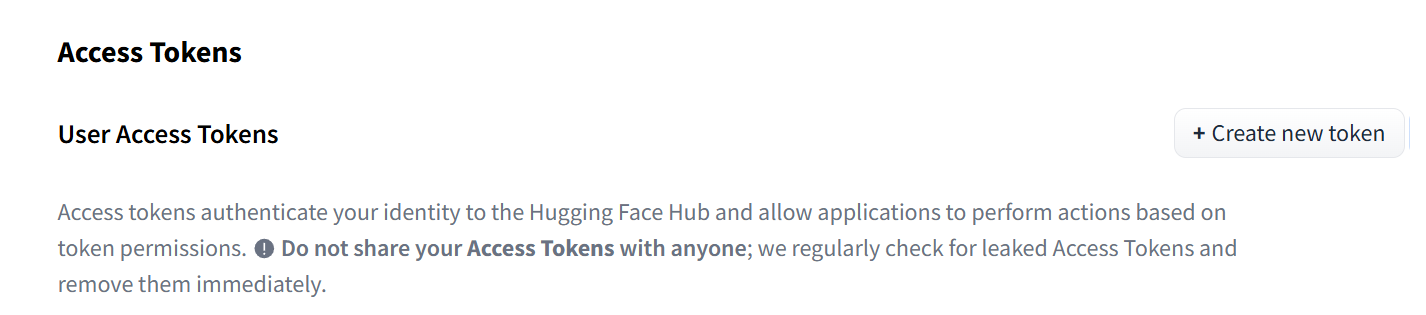
- On the resulting page, create a name for the token and check the following option:
"Read access to contents of all public gated repos you can access"
Here is a screenshot for your reference.
- Click on create token.
- Save the token that is provided. This will be used later.
B. Downloading the Models
In the GitHub repo is a directory called hugging_face_to_local_s3. Within here are Python commands that be run to transfer Granite model from your local desktop to your S3 bucket storage. The Bucket storage can be located on your Openshift Data Foundation or somewhere else. I used MiniIO in this use-case to save some memory and compute resources in my SNO cluster.
- Clone the GitRepo if you would like.
- Export the following environment variables. This assumes that the only user account on the Minio instance is the root user. Run the following commands:
export HF_TOKEN=<HuggingFaceToken>
export AWS_SECRET_ACCESS_KEY=<minioioadminpassword>
export S3_ENDPOINT=http://<minioioinstance>:9000
export AWS_ACCESS_KEY_ID="minioadmin"- You may need to install pip to get the libraries/dependencies required by the Python script and a recent version of Python if you don't already have it.
dnf install python
pip install huggingface-hub boto3 botocore tqdm- Once you do this, run the following command:
python upload_hf_to_s3.py --repo ibm-granite/granite-7b-instruct --bucket instructlab --prefix models/granite-7b-instructinstructlab is the name of the bucket on my S3 endpoint. The prefix is the destination folder/path on my S3 endpoint where the model files will be stored. Please keep this the same to match the YAML code I have provided.
- You can also use an S3 browser to look at the contents. Here is the one I used on my Windows PC.
- Here is the layout I see showing the files have been uploaded.
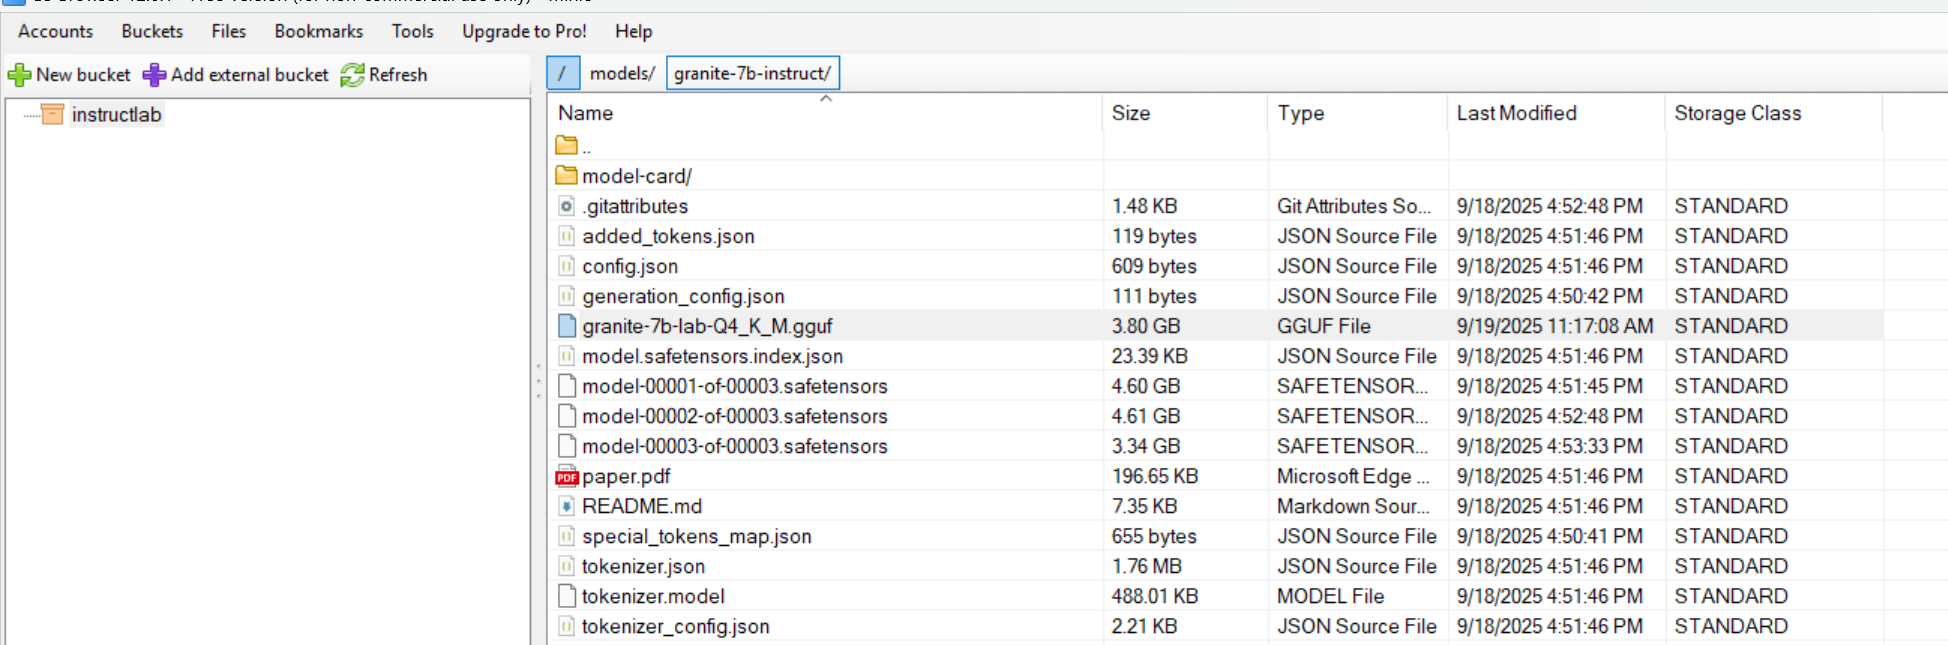
- There is one additional file that was added which is the gguf file. This is needed for the llama cpu instance that will be used later. I am copying it to the same directory for simplicity and to match the YAML files I am providing.
To get the gguf version, download from the following site:
and copy to the same folder where the other files are (models/granite-7b-instruct)
C. Serving the Model on Nvidia GPU
In my home lab, I have an Nvidia 4080 super GPU with 16GB of VRAM. That is what I used for this particular use-case.
- Log into your RHOAI dashboard.
- Under Data Science Projects, create a project called instructlab.
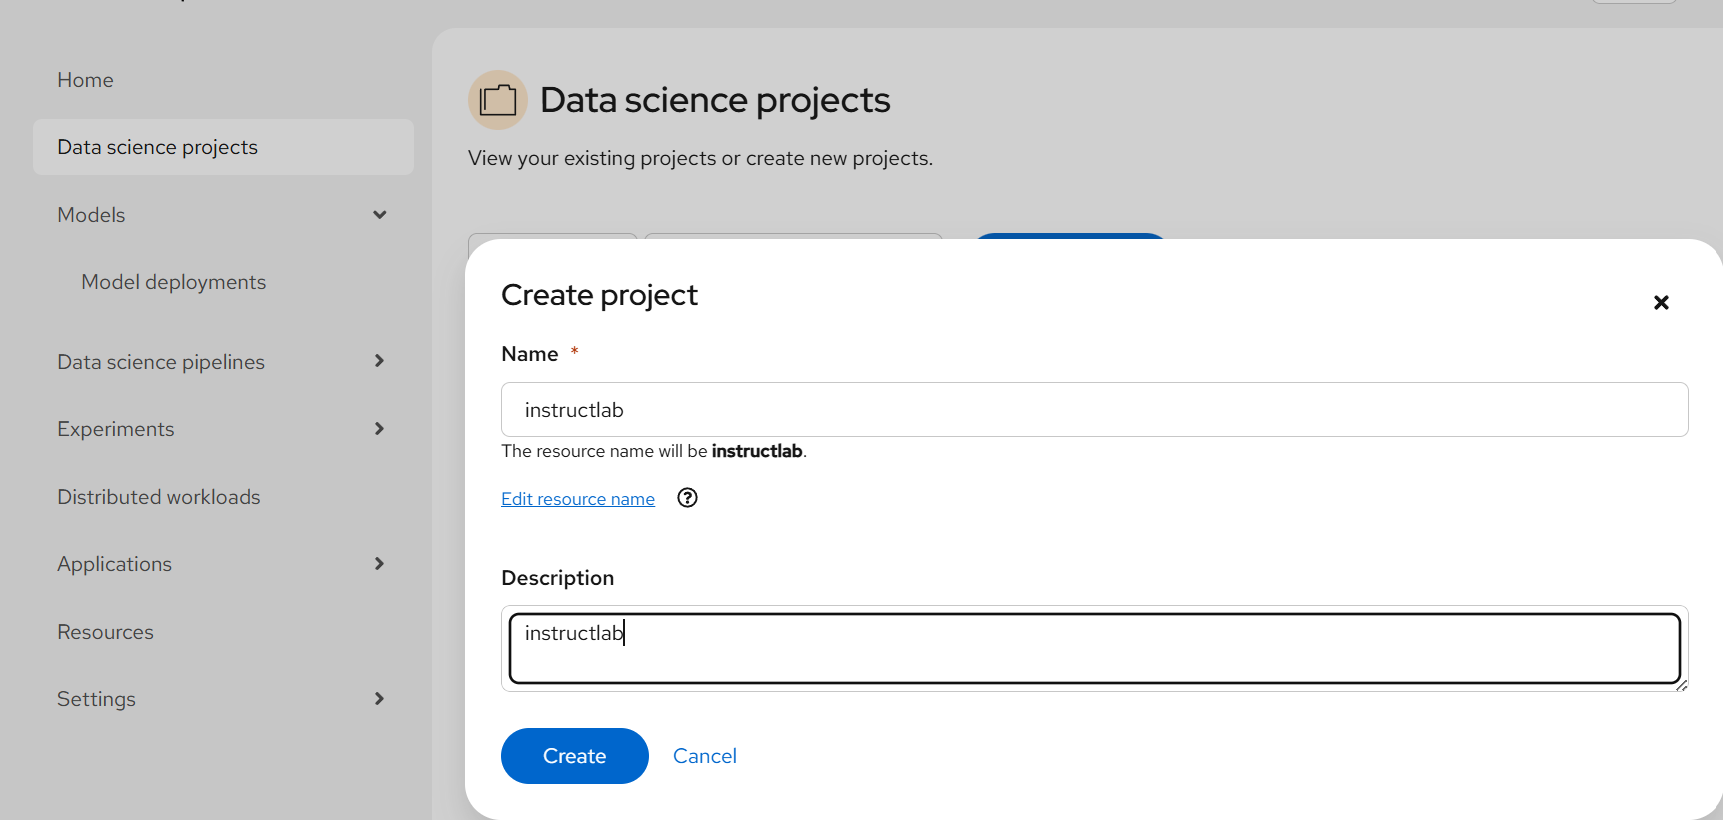
- Next, create a connection under this instructlab project called "minio-instructlab" to match the other code. Point this to your Minio S3 instance or whatever else you have.
- To deploy this model, go to Models --> Model Deployments and click "Deploy Model"
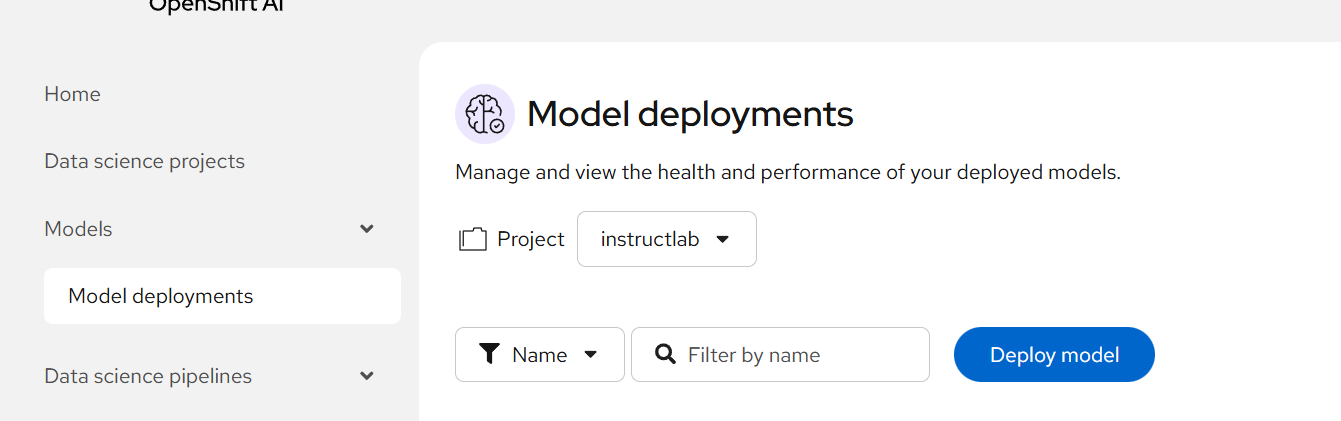
- On the resulting screen, deploy as follows:
Model Deployment Name: instructlab
Runtime: vLLM Nvidia GPU Serving Runtime
Deployment Mode: Standard
Number of Replicas: 1
Model Server Size: Small (any should work)
Accelerator: Nvidia GPU
Model Route: Make deployed models available through an external route (check this box)
Require Token Authentication: Leave unchecked for now
Connection -> Existing Connection: minio-instructlab
Path: models/granite-7b-instruct
Additional Server Runtime Arguments:
--max-model-len=2048
--gpu-memory-utilization=0.92
--dtype=float16
--max-num-seqs=1
The arguments may need to be adjusted based on your GPU. I had to go to lower model length due to my GPU model and tune the gpu-memory-utilization.
Click Deploy
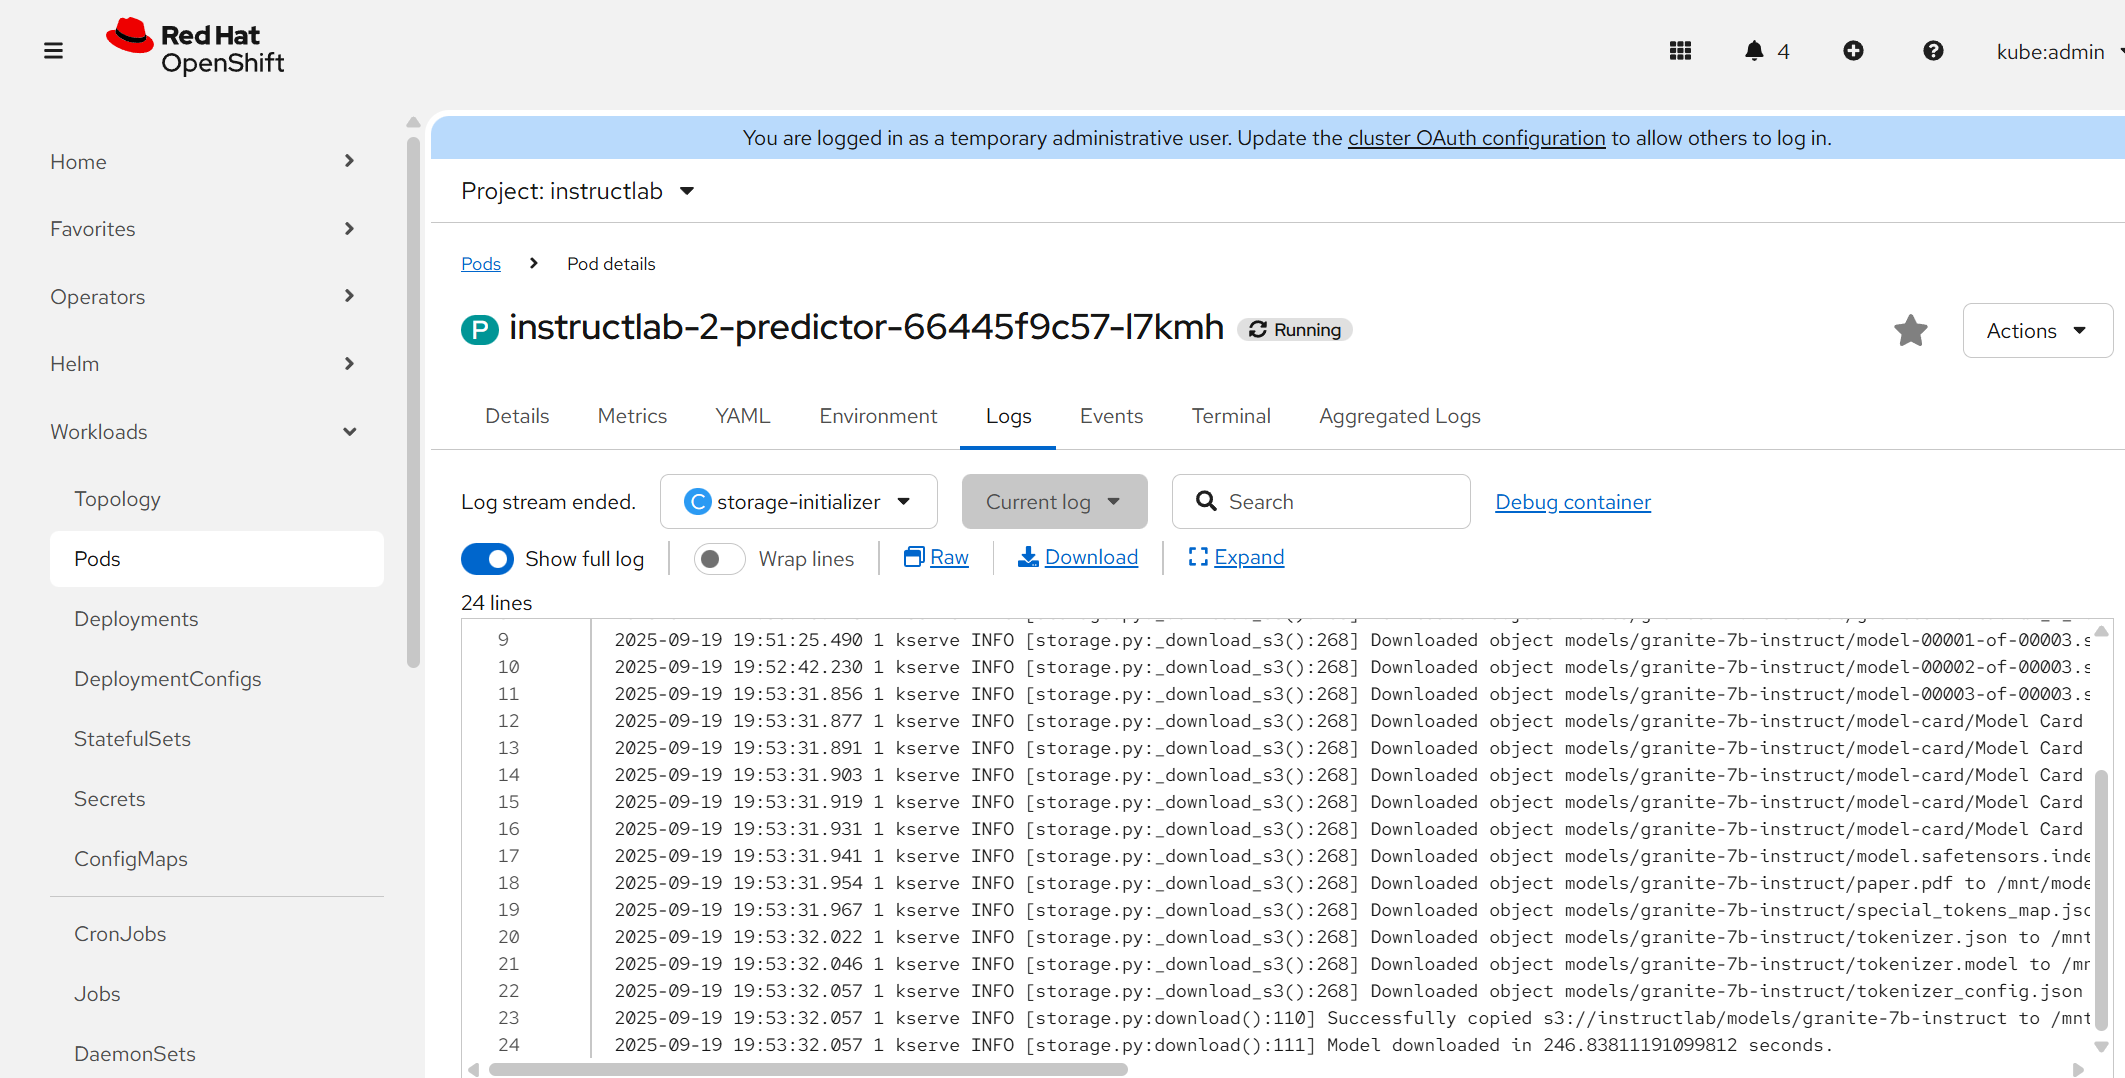
- As this comes up, the model will need to download all the Granite files from your S3 bucket to mount locally on the pod.
Optional: In the instructlab project/namespace will be a pod. Look at the logs on the storage-initializer container if you want to watch this.
- As the pod comes up, the model deployment will look like this (yellow status):
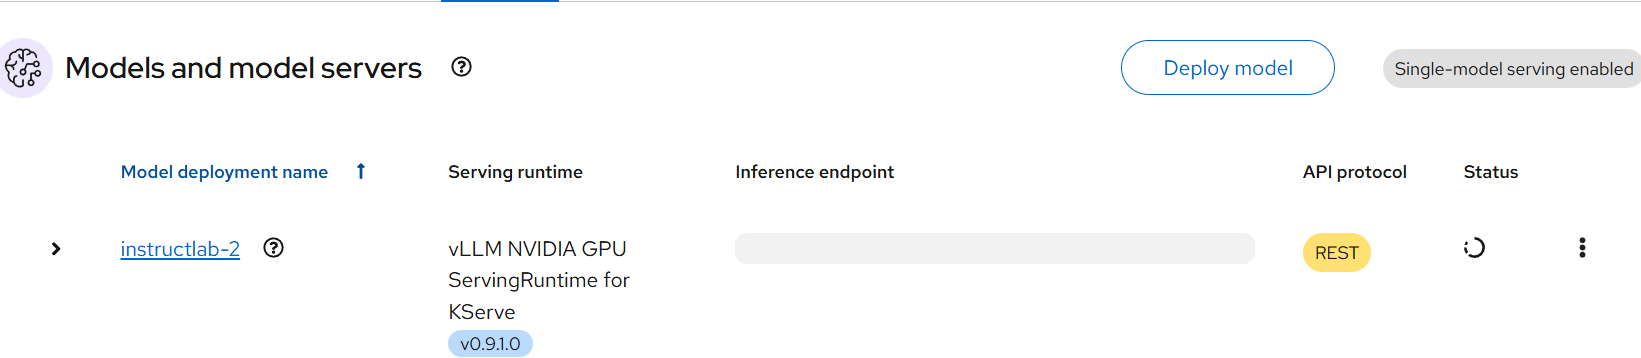
When it comes up, the status will go green:

- Disregard the name of the model called instructlab-2. This is just the second iteration in my lab deployment.
D. Frontend for Nvidia GPU Model
In the frontend directory of the Git Repo are some files you can use and the commands to run. I ran this front-end on a RHEL 9 Linux server. You could run this on OCP itself but that is out of scope for this.
- On the linux host, run the following:
sudo dnf install -y mod_ssl httpd- Create the file called /etc/httpd/conf.d/vLLM.conf. Replace the following:
<fqdnofyourserver>: yourserverfqdn
<yourroutefqdn>: Your route name to your model
<VirtualHost *:80>
  ServerName <fqdnofyourserver>
  DocumentRoot /var/www/granite-client

  <Directory /var/www/granite-client>
    Options -Indexes +FollowSymLinks
    AllowOverride None
    Require all granted
  </Directory>

  ProxyRequests Off
  ProxyPreserveHost Off

  # Talk HTTPS to the backend and SKIP TLS verification (temporary)
  SSLProxyEngine on
  SSLProxyVerify none
  SSLProxyCheckPeerName off
  SSLProxyCheckPeerExpire off
  # If your Apache is older or very strict, also pin protocols:
  SSLProxyProtocol TLSv1.2 TLSv1.3

  # Your OpenShift route (note the /v1/ at the end)
  ProxyPass        /api/ https://instructlab-instructlab.apps.<yourroutefqdn>/v1/ connectiontimeout=5 timeout=65
  ProxyPassReverse /api/ https://instructlab-instructlab.apps.<yourroutefqdn>/v1/
</VirtualHost>- Copy the index.html to /var/www/granite-client/. No adjustments are needed with this.
- Enable httpd daemon and open firewall if needed
systemctl enable httpd
systemctl start httpd
firewall-cmd --add-port=80/tcp --permanent
firewall-cmd --reload- Your model should now be viewable on the webserver as shown below. Go to instructlab-instructlab.apps.<yourdomain>.

Type a message and hit send. You can also hit "Send (stream)" to see the text respond in realtime. Feel free to adjust the max tokens (maximum number of words to return) and temperature as you desire.
The model hallucinates some but is pretty good otherwise.
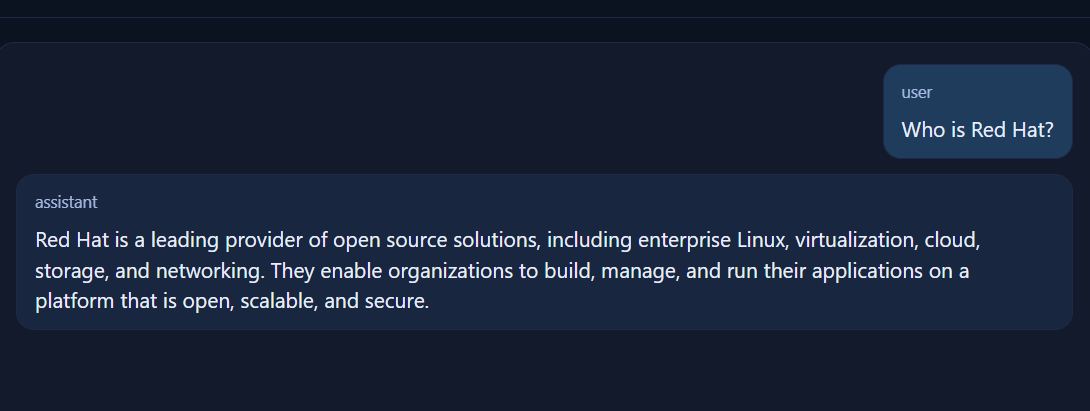
I feel this answer is very accurate 😄
Now, let's apply the CPU version of this which includes it's own GUI (does not work with this one out of the box).
E. Serving on Regular CPU
Feel free to check out the YAML files in the yaml/cpu subdirectory. These can be applied as is on the command line.
- Run the following commands:
oc apply -f servingruntime.yaml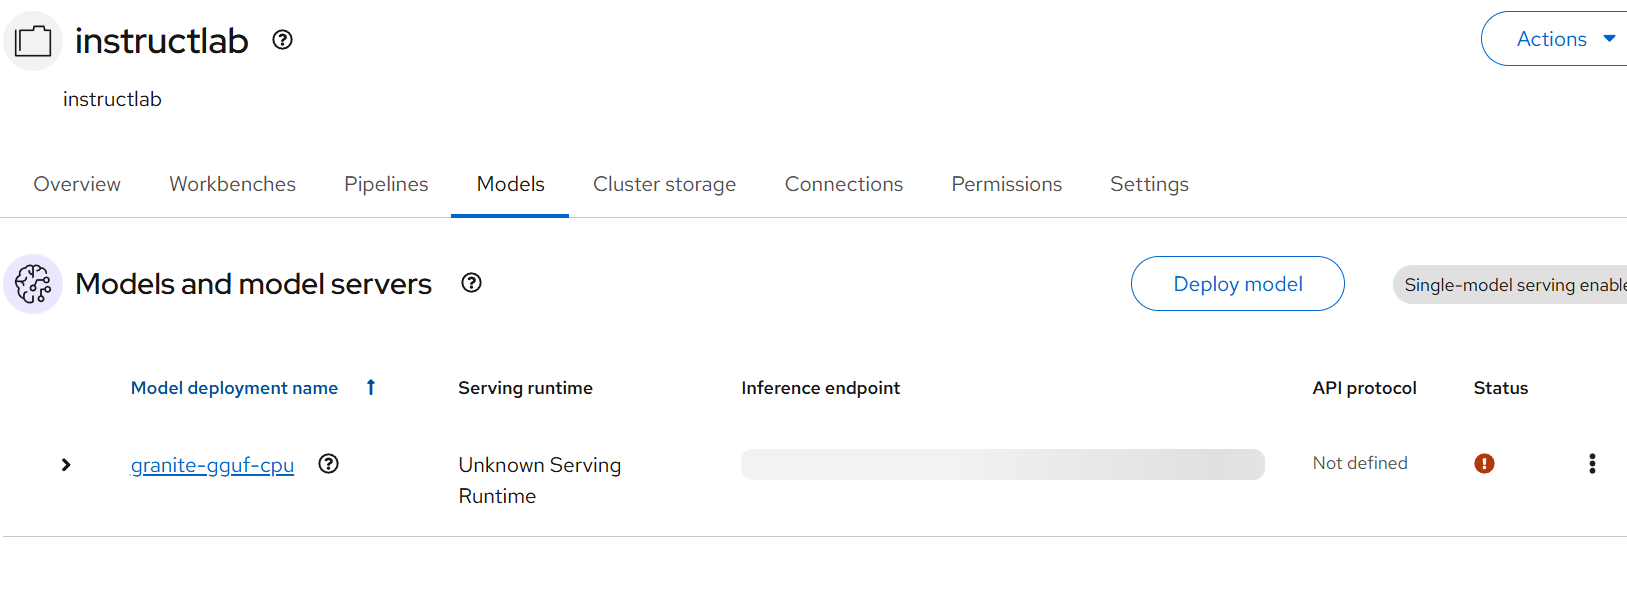
oc apply -f inferenceservice.yaml- The model dashboard will show this red for some reason. I'm not worried about this much now.
- Adjust the route.yaml file contained in the repo. Replace <yourdomain> with the domain name of your OCP cluster and apply.
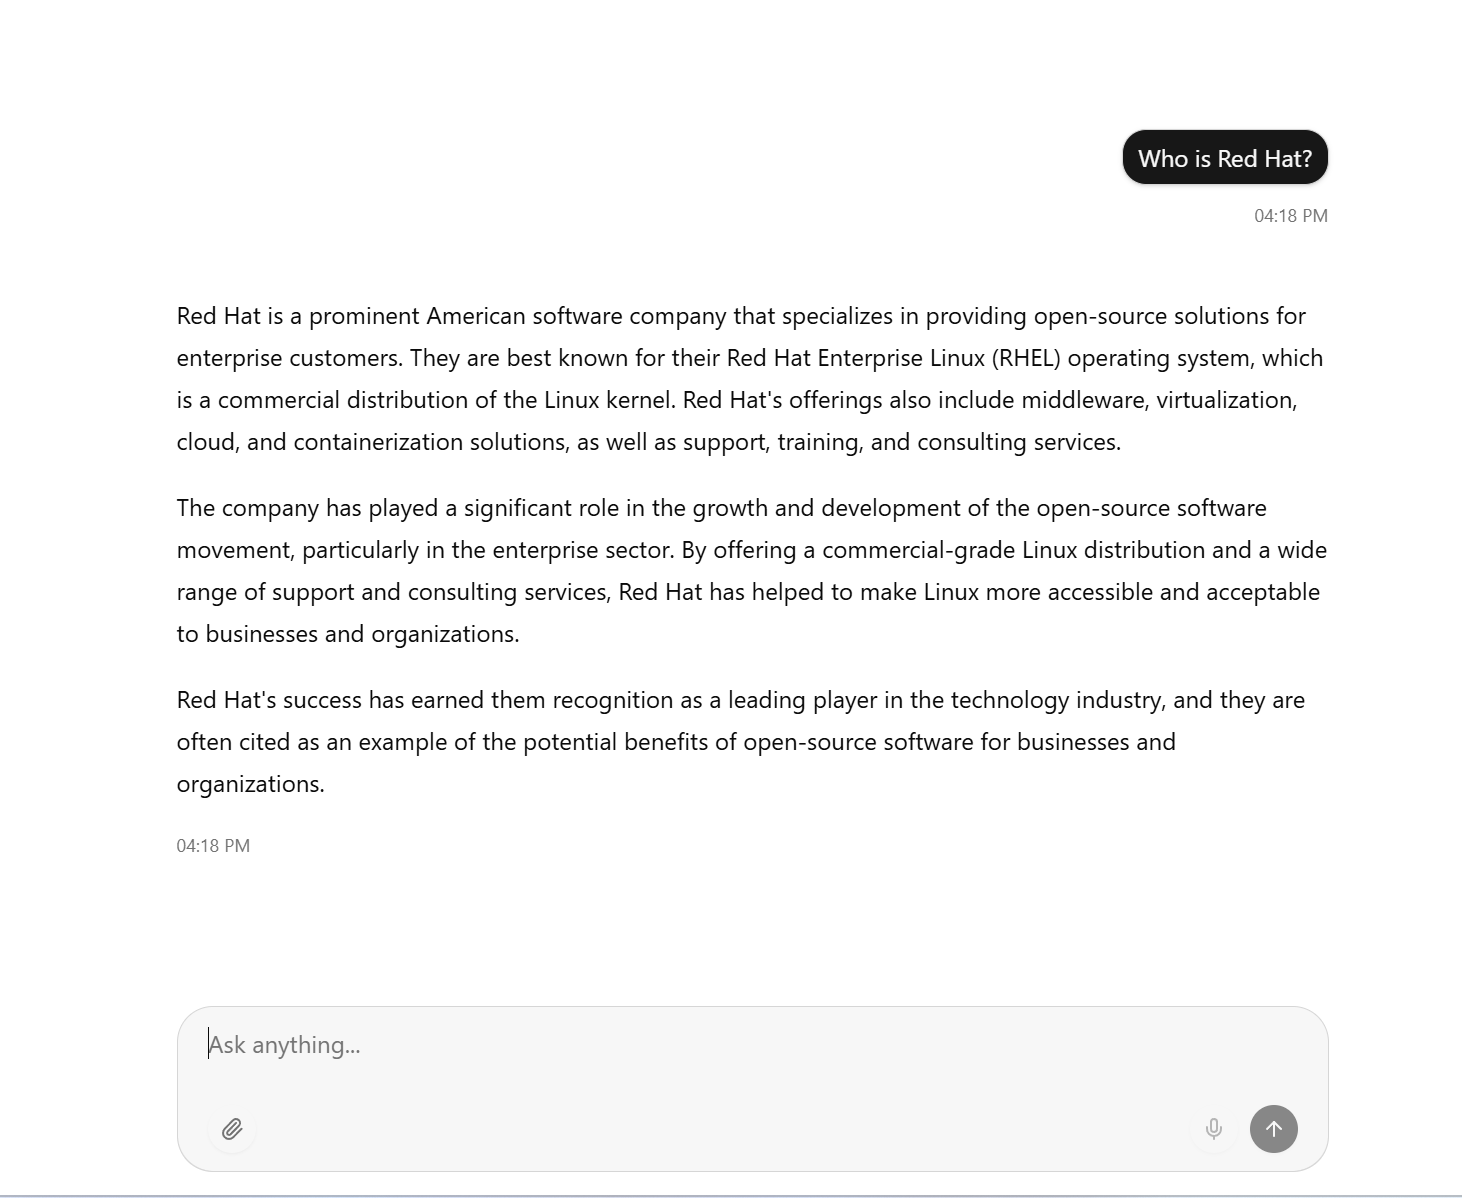
oc apply -f route.yaml- Now, go to this route at https://chatbot.apps.<yourdomain>
I hope you enjoyed this article. Much more to come soon.